How to Make a Catamaran Out of Two Kayaks? Here’s What You Need to Know
If you’re looking for an inexpensive and simple way to make your own catamaran out of two kayaks, then you’ve come to the right place.
In this guide, we’ll provide the necessary steps to create a stable and secure catamaran from two kayaks.
You’ll learn the benefits of making a catamaran out of two kayaks, the supplies you’ll need, a step-by-step guide to tying the kayaks together, constructing the platform, and more.
Plus, we’ll provide tips for ensuring a safe and fun day on the water.
So, let’s get started!
Table of Contents
Short Answer
Making a catamaran out of two kayaks is actually relatively simple and can be done in a few steps.
First, you’ll need to attach the two kayaks together using either rope or straps.
Make sure the kayaks are well secured together and evenly balanced.
Then, tie a cross beam between the two kayaks to make a platform for seating and storage.
Finally, add any additional gear, such as paddles and life jackets, that you may need for your journey.
With these steps, you’ll have your own DIY catamaran made out of two kayaks!
Benefits of Making a Catamaran Out of Two Kayaks
Making a catamaran out of two kayaks is a great way to enjoy the open waters with added stability and capacity compared to a single kayak.
Not only is it relatively easy and inexpensive to do, but it also allows you to explore further and carry more gear than you would with a single kayak.
One of the main benefits of making a catamaran out of two kayaks is that it provides added stability.
A catamaran is inherently more stable than a single kayak because the two hulls provide a wider base, which helps prevent tipping over.
This is especially beneficial for those who are new to kayaking, as it gives them additional confidence on the water.
Another benefit of making a catamaran out of two kayaks is that it gives you more capacity.
By combining two kayaks, you can carry more gear and supplies than you would with a single kayak.
This makes it perfect for overnight trips or long-distance paddles, as you can easily carry enough food, water, and other supplies to last the entire trip.
Finally, making a catamaran out of two kayaks is also relatively easy and inexpensive.
All that is needed are two kayaks, a few pieces of wood, and some basic tools.
With a few simple steps, you can have a great time on the water without breaking the bank.
In conclusion, making a catamaran out of two kayaks can be a great way to explore open waters with added stability and capacity.
So if youre looking for a fun and safe way to enjoy the water, making a catamaran out of two kayaks is definitely worth considering.
Necessary Supplies
When it comes to making a catamaran out of two kayaks, there are certain supplies that are necessary for the job.
The most important items needed are two kayaks, some pieces of wood, and basic tools.
Depending on the type of kayaks, rope or bungee cord may also be necessary.
The two kayaks should be tied together with rope or bungee cord.
This will provide the necessary stability and capacity that a catamaran needs.
The rope or bungee cord should be tied securely, but not too tightly, to ensure that the kayaks dont move apart when in use.
Using the pieces of wood, a platform should be constructed to attach the kayaks together.
This will provide the necessary support for the kayaks to be on the same level.
The platform should be made with durable wood that can withstand the elements and the weight of the kayaks.
Once the platform is in place, the kayaks should be secured together with more rope or bungee cord.
This will ensure that the kayaks stay together and remain secure.
With these supplies, youll be able to construct a catamaran out of two kayaks, providing a great way to explore open waters with added stability and capacity.
It is a relatively simple process to do, and with the right supplies, youll be able to enjoy a fun and safe day on the water.
Step-by-Step Guide for Tying the Kayaks Together
Tying two kayaks together to create a catamaran is a fairly straightforward process that can be completed with minimal supplies and basic tools.
To get started, select two kayaks that are similar in size and shape.
If the kayaks are not the same size, one may need to be secured higher than the other for balance.
Once the kayaks are selected, its time to start tying them together.
Begin by securing a rope or bungee cord around the kayaks, making sure to wrap the cord around both kayaks several times.
Its important to make sure the cord is tied tightly and securely; if the cord is too loose, the kayaks are likely to move while in the water, which could be dangerous.
After the rope or bungee cord is secured, a platform should be constructed out of wood and attached to the kayaks.
This platform should be large enough for the items being stored on the catamaran, such as coolers, fishing gear, and other supplies.
Once the platform is attached, its important to securely tie the kayaks together with additional rope or bungee cord.
This will help ensure that the kayaks stay together and dont move while in the water.
By following these simple steps, anyone can easily create a catamaran out of two kayaks.
With a little bit of planning and the right supplies, this project can be completed in just a few hours.
With the catamaran in place, its time to hit the open waters and enjoy a great day on the water.
Constructing the Platform
Constructing the platform for a catamaran out of two kayaks is the next step in the process.
The platform should be constructed out of wood, such as lumber or plywood.
The size of the platform will vary depending on the size of the kayaks and the desired capacity, but the general rule is that the platform should be at least twice the width of the kayaks.
The platform should also be long enough to span the distance between the two kayaks.
The platform should be constructed with two crossbeams for added stability.
These should be secured to the kayaks with bolts, screws, or rope.
The crossbeams should be evenly spaced along the length of the platform.
Once the platform is constructed, it should be secured to the kayaks with more rope or bungee cord.
It is important to make sure the platform is strong and secure.
Make sure that the crossbeams are securely attached to the kayaks and that the platform is securely attached to the crossbeams.
If the platform is not secure, it can cause an instability that could lead to an accident while out on the water.
Once the platform is secure, it’s time to enjoy your new catamaran!
Securing the Kayaks Together
Once the kayaks are tied together, it is time to secure them for a more stable and reliable ride.
This is done by looping additional rope or bungee cord around the kayaks and tying them together.
This creates a secure connection between the two kayaks and ensures that they will remain connected while out on the water.
Additionally, it is important to make sure that all knots are tightly tied and not loose.
This will help to ensure that the connection between the kayaks remains strong and secure.
Additionally, it is important to inspect the knots periodically throughout the day to ensure that they are still tight and secure.
This is especially important if the kayaks are being used in choppy or turbulent waters.
Tips for Ensuring a Safe and Fun Day on the Water
Making a catamaran out of two kayaks is a great way to explore open waters with added stability and capacity, and it can be done relatively easily and with minimal supplies.
However, its important to take the proper steps to ensure a safe and fun day on the water.
Before you begin, make sure you have all the necessary supplies.
This includes two kayaks, a few pieces of wood, rope or bungee cord, and basic tools.
Make sure you have enough of each material to complete the project.
Once you have all the supplies, its time to tie the kayaks together.
Make sure the rope or bungee cord is tied securely and tightly, as it will be responsible for keeping the kayaks together.
Its also important to make sure the kayaks are tied together in the correct way.
The best way to do this is to tie the sterns together and then tie the bows together.
Next, you will need to build a platform out of the wood.
Make sure the platform is the correct size and securely attached to the kayaks.
This will be the base for the catamaran.
Finally, to ensure the kayaks stay together, you should use additional rope or bungee cord to tie the kayaks together.
Once you have completed all these steps, youre ready to hit the open waters! Just remember to be safe and have fun.
And, if you ever have any doubts, seek out professional help to make sure your catamaran is constructed correctly.
Other Ways to Make a Catamaran Out of Two Kayaks
Making a catamaran out of two kayaks is a great way to explore open waters with added stability and capacity.
It can be done relatively easily and with minimal supplies, allowing you to save money and still have a great time.
In addition to the rope and wood mentioned above, there are a few other methods that can be used to make a catamaran out of two kayaks.
One option is to use a pair of inflatable air mattresses.
These mattresses can be used to create a platform between the two kayaks that will provide additional stability.
The mattresses should be connected with rope or bungee cord and then secured to the kayaks.
This is a great option for those who dont want to build a wooden platform or dont have the necessary tools.
Another option is to use two pieces of foam.
This method is similar to the inflatable mattress option, but instead of using air mattresses, two pieces of foam are used to form the platform.
The foam should be cut to shape and then connected to the kayaks with rope or bungee cord.
This is a great option if you dont have access to an air mattress, but it may not be as durable as a wooden platform.
Finally, another option is to use a piece of plywood.
This method is similar to the wooden platform option, but instead of using individual pieces of wood, a piece of plywood is used to form the platform.
The plywood should be cut to shape and then connected to the kayaks with rope or bungee cord.
This is a great option if you have the necessary tools and access to a sheet of plywood, but it may not be as strong as a wooden platform.
No matter which method you choose, making a catamaran out of two kayaks is a great way to explore open waters with added stability and capacity.
With the right supplies and tools, you can have a fun and safe day on the water.
Final Thoughts
With the right supplies and a bit of knowledge, you can easily construct your own catamaran.
So why not give it a try? You’ll be sure to have a great time out on the water with your new craft.
James Frami
At the age of 15, he and four other friends from his neighborhood constructed their first boat. He has been sailing for almost 30 years and has a wealth of knowledge that he wants to share with others.
Recent Posts
When Was Banana Boat Song Released? (HISTORICAL INSIGHTS)
The "Banana Boat Song" was released in 1956 by Harry Belafonte. This calypso-style song, also known as "Day-O," became a huge hit and remains popular to this day for its catchy tune and upbeat...
How to Make Banana Boat Smoothie King? (DELICIOUS RECIPE REVEALED)
To make a Banana Boat Smoothie King smoothie at home, start by gathering the ingredients: a ripe banana, peanut butter, chocolate protein powder, almond milk, and ice. Blend the banana, a scoop of...
Item added to your cart
Open media 1 in modal
Open media 2 in modal
Open media 3 in modal
Cape Falcon Kayak
Rigging: Catamaran Loop Kit
Couldn't load pickup availability
This plastic plate, pad eye, fastener and bungee cord combo gives you everything you need to build a pair of attachment points for our kayak/pack canoe catamaran system. On the pack canoes it doubles as an attachment point for the removable backrest in the stern and self-rescue loops in the bow. Please read the following options carefully:
These are sold in pairs and you will need 4 pairs total for 2 canoes or 2 kayaks. If only one forward attachment point is desired on the ridged deck modern kayaks, 3 pairs is enough, (4 will give you two potential attachment points on the ridged front deck which is useful at times) and if a second forward attachment point is desired on the front deck of the flat deck version (also useful at times see video), then 6 pairs will be needed.
Keep in mind that if you are purchasing a kayak building kit from us you can select the back deck catamaran loops as part of the kit, and therefore you will only need to purchase the front deck attachments.
Also, if this is intended for the forward attachment point on our flat deck F1 or LPB AND you'll be adding a sail, chose the option which substitutes 2 stainless eyes for the sail stays at the front of the forward catamaran attachment. (Do not choose this option for the a ridged deck sailing version.)
If ordering a pair of these for the an attachment to be screwed into the hardwood forward deck stringers on the flat deck version only, you will need shorter fasteners than those provided.
We sell this with 8 feet of very high quality marine grade bungee (twice as much as you need) so you have extra for mistakes and spare bungee for on the water repairs. Cut the bungee into 2 foot sections per attachment point for best bungee yield.
Kit includes: 8 feet high quality marine-grade bungee 2 ea plastic wear plates 4 ea 3/8" nylon pad eyes(Flat deck sailing kit replaces 2 nylon pad eyes with 2 stainless pad eyes) 8ea #8 x 1 1/4" stainless screws 2ea #4 x 3/4" stainless screws
Choosing a selection results in a full page refresh.
Log in or Sign up
You are using an out of date browser. It may not display this or other websites correctly. You should upgrade or use an alternative browser .
Canoe Catamaran
Discussion in ' Boat Design ' started by kmeastman , Dec 11, 2007 .
kmeastman Junior Member
I am a Mechanical Engineering student at the University of Nebraska-Lincoln. For my senior design semester project I would like to design a catamaran that is sail powered and uses two canoes as its two hulls. I have never designed a boat so I was hoping that more experienced people could help me out. The purpose of using canoes is mostly because the cargo/people capacity would be much greater than with most catamarans. I realize that this would make the boat slower than the average catamaran but I am ok with that. I was thinking along the lines of using 17' aluminum canoes, which usually come with two seats (each canoe), but a third would likely be added. It would likely be built to the maximum trailerable width of 8'6". I was thinking of having only one mainsail and probably adding a captain's seat between the two canoes toward the rear. I have done some preliminary research and here are the problems I forsee: 1. Since I am going to buy the canoes instead of building them, I can't get very good estimates of factors like wetted area and lateral plane area. I think I could figure them out if I had a canoe to take measurements on and then model it in a 3D CAD program. The problem is that I don't want to buy one and then find out that I need a larger or smaller one to make this work. 2. The major difference between a canoe hull and a catamaran hull is its width at the water level. Since the canoe is much flatter, it will have a large wetted area compared to its lateral plane area. I'm not sure how big of a problem this could be. I could increase the lateral plane area with the use of a center board but I would definitely have more overall wetted area and drag than an average catamaran. Again, I am not overly concerned about the speed I can get out of it, but it will hardly be worth putting a sail on it if its going to be too slow. 3. Catamarans that I have seen have similar L/B ratios to what I am talking about here. However, because a canoe is much wider than a catamaran hull, the center to center distance between the canoes would be much smaller than the center to center distance on a catamaran given the same L/B ratio. Is this a problem? 4. I was thinking that the boom of the sail would be mounted high enough that it would clear the head of the person in the middle seat (much lower than the other two seats) and the boom would not be long enough to reach the person in the back seat. In order for it not to hit the person in the front seat the rotation of the sail would have to be limited. Since the pivot of the sail and the front seat will likely be at about the longitudinal placement, this is about 180 degrees of rotation. From sailing books I have read, you should never need your sail to be rotated more than this but is there any reason why limiting its travel would be a problem? Any help is appriciated. If you have any advice on these problems or can think of any other possible problems I would love to hear what you think. Thanks Kevin
masalai masalai
Research on polynesian ocean voyaging and Melanesian ocean voyaging and some of the catamaran threads.
Pericles Senior Member
I concur. http://pvs.kcc.hawaii.edu/ http://www.pbs.org/wayfinders/polynesian2.html http://www.janeresture.com/voyaging/main.htm http://www.moolelo.com/hokulea.html http://starbulletin.com/2007/03/18/news/story04.html Masalai, Two minds with but a single thought. Pericles
Seasons greetings to you Pericles (God of ? remind me. I was endeavouring to maintain a "grumpy old *******" attitude and make him look for himself. Good exercise for the young wipper-snapper. eh eh eh
Village_Idiot Senior Member
A coupla things I would consider: 1) Canoes generally aren't used for catamaran hulls because they can take on waves/water and list/sink/capsize. If you're going to sail this thing in anything with over foot-high waves, you need to make the hulls shed water. Maybe try the FRP solid (sit-on-top) kayaks that have no interior. However, you will lose your room/capacity that you are trying to gain with the open hulls. 2) You can get around the 8.5' beam limitation by making the hulls movable under their scaffolding - once the boat is launched, move the hulls outboard to gain your stability. Depending on how wide you want the scaffold (deck), you can even go narrower than 8.5' to make trailering easier. 3) For truly innovative engineering design, use flat-transom canoes (that you can put an outboard on if you wanted), then design a configuration where you can swing one of the 17-foot canoes around backward so you can join the two canoes at the transoms and make a nice 34-foot canoe (remember, longer displacement hulls are faster and more efficient). This would give you a l/b ratio of around 11:1-12:1. You can add an outrigger for stability. Properly designed, you can turn the sailing cat into a fast outrigger canoe for when the wind isn't blowing. Maybe you could even design the mast, and/or the deck, to do double-duty as an outrigger. Or maybe just have an efficient fast-sailing canoe with a proper outrigger and sail combination...
Thanks for your suggestions, I have seen the polynesian sailing canoes that you are talking about, which is what convinced me that my idea would work. I have checked out some of the other threads on catamarans and have gotten some valuable info from them. I'll check out the specific websites that you reccomended. As for the canoes taking on water, I do not intend this to go on real rough water. It will probably always be used on inland lakes and probably not on water rougher than you would normally take a single manually powered canoe on. If the water became an issue, do you think you could put some kind of water deflector on the top edge of the canoe that would make splashing waves bounce away from the hull? As for the trailering, I have already thought about making the boat wider by sliding the hulls out after it gets trailered. I would like to avoid this but I haven't done enough calculations yet to make sure it would be stable without any extra width. I really like your idea idea about the 2 flat transom canoes. I had anticipated using the double ended ones but one of the whole purposes of this project is to have a very versatile boat. One of the design requirements is that it needs to be dissassembled to portage between two lakes. This way the canoes could still be used individually too. I like this idea of having an extra long canoe as another option. It could be used maunually powered or if I decided to add an outrigger could be sail powered. Also, I didn't really want it to have an outboard motor on it, but if I had the flat transom style canoe I would have that option in the future.
rwatson Senior Member
James Wharram designs sailing catamarans that are canoes - with a kyak like covered in seat in each hull
Petros Senior Member
Sounds like a fun project. How about one really large cargo carrying canoe (better l/w ratio), with a kayak outrigger (or even two kayaks to make a trimaran). The kayaks can be attached to the outrigger booms with quick and simple bungee cord mounts. That way you do not have to unpack the canoe to take one of the kayaks out to scout ahead or find a campsite, etc. You would have more flexibility as to the use of the hulls together or apart too. Under sail the passengers and cargo are all together, where your single rudder is located on the center hull. The sea kayak outriggers could also store cargo was well, or an extra passenger. It would also be easy and light to attach the outriggers after trailering so you can go much wider which is much better. You can carry more sail this way too. There is less drag with a larger distance between the hulls, so not only can you carry more sail, but lower drag too due to interference effect from closely spaced hulls. the rotation molded sea kayaks (called "Tupperware" kayaks) are cheap, get them used from craigslist. Or better yet, build skin-on-frame kayaks, quick, light and inexpensive. I've built seven, they have cost me $30 to $50 each to build (using salvaged lumber), even buying all the materials new would still only cost about $100 or so each. Mine weight only about 20 lbs complete (attaching something this light after trailering would be an easy task). The canoe can be built skin-on-frame as well, a lot less expensive and lighter than aluminum. BTW it is common to use fabric splash covers on river canoes to keep the water out, no reason that could be done on your canoes as well. Good luck.
Well, the project has been approved and is underway. My group was able to model the canoes and get some measurements like lateral plane area, Longintudinal center of buoyancy, LWL, and wetted area for different weights. I have done some estimates on D/L and SA/D ratios and they seem within reason for the kind of boat I would like to build. Most of the reccomendations for these ratios that I have seen are for monohulls. Would they be any different for a catamaran? Is there any books or websites that anyone can reccomend that give calculations or reccomendations that are specific to catamarans? What I would like some help with is how to determine if the lateral resistance area that I calculated is enough or if I need to add a centerboard. Also, what calculations can I make with the wetted area? Thanks for the help, Kevin
"Also, what calculations can I make with the wetted area?" You can calculate how wet the wetted area is ? Years ago, an old yacht designer told us kids about how to determine the centre or resistance without any math. He cut out a profile of the underwater hull from a piece of cardboard, balanced the shape on the edge of a ruler, and where it balanced, marked it as the centre of lateral resistance. It seemed to work back then. I always wondered if the profile he cut should have been the profile of the heeled yacht (would have had a curved top edge and a shorter keel), but that would not apply to catamarans. Does anyone else still use this or a similar technique these days?
FAST FRED Senior Member
There are plastic pontoons made that can be put together to most any length to build your basic boat.. The shape of the weted surface would be better than the canoe , and might even be cheaper. FF
The wetted area is used to calculate the drag. The less the wetted area the better, but in a canoe or monohull the smallest wetted area is a semi-circular cross section, which means no resistance to heeling moments. On a cat this matters little, so many cat hulls are semi-circular in cross section (for least drag) but if you use the hull as a canoe it will simply roll over. You need a flatter bottom so it has some inherent stablity,
There are very few cat hull that are semi circular in cross section! They are either bell shaped or sharp edged. The sides are flattened to resist leeway, and avoid the necessity of big daggerboards. Certainly the forward part of the hulls are almost knife shaped, for easy entry to waves and wind. Examples, Hobie Cat, Tornado (which has a semi circle for a small section of the stern), Nacra etc These features to enhance sailing ability will be far bigger considerations than a bit of friction on a small 16ft hull. due to wetted area.
Guest625101138 Previous Member
Kevin Get hold of a hull surface rendering program called Delftship. You can get a free version of it. Look at the hulls you are thinking of buying and draw approximate models in Delftship. This should take all of 10 minutes if you are a slow learner. If you are having trouble then post a couple of photos and I will spend the 5 minutes to do them for you. Delftship will provide you all the hydrostatic information. It will give you crap hydrodynamic data. However you can export the hull into Michlet format and then use Michlet to get accurate drag information - within 5% for a canoe type hull. With a sailing cat you can design for many cases. The two extremes is where you have both hulls equaly loaded on say a beam reach. The other extreme is where the entire weight is carried on a single hull when you are pushing hard to windward. There are obviously a whole series of load cases in between but looking at resolving the forces under these two extremes will give you a good understanding. If you want help on the detail after you get started, just post specific questions that are giving you difficulty. Rick W.
Advertisement:
rwatson said: ↑ There are very few cat hull that are semi circular in cross section! They are either bell shaped or sharp edged. The sides are flattened to resist leeway, and avoid the necessity of big daggerboards. Certainly the forward part of the hulls are almost knife shaped, for easy entry to waves and wind. Examples, Hobie Cat, Tornado (which has a semi circle for a small section of the stern), Nacra etc Click to expand...
2 person Small Solar powered catamaran. Pedal board. Wood canoe
Do homebuilt kayaks & canoes need hull identification numbers in the U.S.?
Solo Canoe Camper concept: one or two outriggers?
Nesting canoe
Canoemaran, catcanoe
Child size kayak/canoe.
Modular canoe
can a boat be a canoe, kayak and sliding seat rower?
10m, 10 passenger canoe for use on Amazon River
Exofish!....a WIG canoe
No, create an account now.
Yes, my password is:
Forgot your password?
FUSION THE SMART CHOICE
BUILDING YOUR DREAM
FUSION THE BOAT
TESTIMONIALS
The Fusion 40 "Kit Cat" is revolutionising the boatbuilding industry. This vessel has been designed from the beginning as a high performance cruising catamaran that can be stacked into 40 foot containers and freighted anywhere in the world.
This photograph shows the infusion moulded components as they would appear when removed from the container. Complete with moulded non skid and all the recesses for hatches and portlights. The components even have individual quality control certificates.
Construction Flexibilty:
By producing this modern catamaran in modules, which in turn fit in containers, it has meant delivery is simple and it has opened the doors to worldwide marketing of the Fusion 40. The cost savings on overseas shipping as deck cargo, is in excess of $40,000.00. Private contractors are available to assist with assemblies to any stage if you desire.
By producing a catamaran in sections also has great appeal to the professional boatbuilder as well as amateurs, as they can install mechanical and furniture items as they assemble, rather than working in confined spaces.
No longer are you dictated to, Fusion Catamaran Co. supplies the structural components along with the hull and deck sections but leaves the entire fitout and layout to the owner. This allows the builder to work with their preferred materials, and allows for personal preferences as to accommodation and functions. However Fusion Catamarans have a very comprehensive Multihull Construction Guide web site to support clients.
By producing the supplied components in Foam/Glass, they are weather proof and even if your build project ran into years, there will be no deterioration, shrinkage, dry rot, etc., of the components
Instead of spending 6 months gluing strips and planks, then glassing over and fairing, fairing, fairing only to finish up with a product that has small appeal to another buyer, you can now have a beautifully gelcoated, factory finish on your Catamaran, which can be assembled in as little as 12 days (4 men).
Having gelcoated, fibreglass, foam cored and production built components (to Class "A" CE Certification) provides comfort to the owners that his vessel will be highly sought after when it comes time to sell.
Also by having a worldwide marketing base through the Agent/Builder network, an owner can gain comfort in the fact that anywhere he travels he can be assured of a helping hand as well as recognition of his Fusion.
Whilst these pictures above were taken during the assembly of the test boat in Fusion's facility, the pictures at the below show assembly can be achieved in more simple surroundings.
For more information on this fabulous product, or even where the closest one to you is, please click here to contact us .
The schionning team have a lot of contact with equipment suppliers and manufacturers, and hear feedback on certain brands or systems from our many customers. there are many schionnings cruising the world and testing products longevity and the customer service offered by the manufacturer., on this page we will list products and companies that we know to provide above average quality and service. it is always growing, and if your company provides equipment used on our designs and you would like to be included - please contact us., engines & drive systems.
Visit: https://oceanvolt.com
Batteries, Power Management
LITHIUM POWER (VIC)
Back in 2013 I knew that my boat batteries were reaching the end of their lives, I had been researching LiFePO4 cells for a few years and decided that I should install them. Unfortunatly I was unable to find a local supplier. So Lithium Power was established.
Technical Information
The technical information page is a collection of documents (mostly in pdf format) on the materials and systems used in schionning catamarans. including data sheets, engineering information, strength comparisons of each core material and informative articles from jeff outling the design of certain system such as engine choices and main sheet systems., detailed engineering data for your research, we understand that getting your head around the process of building your own boat, or having one built, can take a little while. to gain a greater understanding of the materials used in our designs, the below data sheets have been supplied by atl composites, and contain all of the technical data you could need regarding the composites we use. in addition are articles or documents written by jeff about certain systems used on our designs and why., all technical information and data sheets on west system/duflex/durakore provided courtesy of atl composites. for more information please see the atl composites website here., documents library.
Information Sheet – CE CERTIFICATION PROCESS
Mainsheet Systems for Catamarans
Motor Choices for Schionning Designs
Weight and Weight Distribution Schionning Designs
Schionning Designs Sailing Performance and Tips
Hull Shapes and Performance – Power Designs
Outboard Engines VS Diesels – Written by Ross McCombe
An Outboard Installation That Works – Ross McCombe Follow up
Data Sheet – DUFLEX BALSA for Catamaran Kit Builds
Data Sheet – DUFLEX FOAM
Data Sheet – FEATHERLIGHT Paper Honeycomb
Data Sheet – WEST SYSTEM R105
Data Sheet – PUMP SYSTEMS
Data Sheet – MICROFIBRE BLEND 403
Data Sheet – MICROLIGHT 410
Data Sheet – MICROSPHERES 411
Information Sheet – USING FILLERS
Data Sheet – KINETIX RESIN Thixotropic
Information Sheet – DURAKORE PLANKS 413
Data Sheet – DURAKORE PLANKING 414
Kit Materials Contents
Kit materials' contents, so if you order a schionning kit, what exactly is going to arrive see an overview of the materials you will receive, and what each is used for during the build process. fibreglass cloth or tapes microspheres, microballoons or microfibers take a closer look and you can answer these questions., our schionning kits are a no nonsense, common-sense approach to building a boat. we offer great service, fast delivery and access to anything you could need for your boat straight from the supplier to your door. our construction plans and kits are sold with 100% professional boatbuilder support via phone and email, any time you're unsure or just need a second opinion, we're here..
Our kits contain all of your basic materials to build your boat to a faired shell stage, ready for painting and fit-out. We have sail-away costing estimates available for all of our standard designs, and this will give you an accurate idea of the overall cost of your project. This costing varies depending on your level of finish, as you can imagine different options vary greatly in price.
Below is a quick glance at what your Schionning Kit will include and what each item is primarily used for, we hope this is helpful and if you should require more detailed information please don’t hesitate to contact our office.
What do I actually receive?
DUFLEX PRE-LAMINATED PANELS
DuFlex pre-laminated panels are the main and most important material used in our kits, predominantly in the flat panel designs, however they are used in Strip-planked designs also, though to a lesser extent. These panels are 2400mm x 1200mm and are CNC routed to speed up build time on our Wildernes X Series, as well as some of our power designs. For internal furniture, a paper honeycomb core is used instead of the end-grain balsa wood core that is used for main structural areas. The use of this is purely to save weight in the shell and therefore produce a faster, more responsive catamaran.
KINETIX LAMINATING RESIN & HARDENER
WEST SYSTEM EPOXY RESINS
FIBREGLASS TAPES (DOUBLE BIAS)
CARBON FIBRE CLOTH
FIBREGLASS CLOTH
The kit process, building your own boat can be a daunting prospect, however to demonstrate each step in the kit assembly process, we've created this guide for you to study. as you can see our kits are the ultimate in building efficiency and have been streamlined over 30+ years to ensure that you're on the water faster and with less effort., how does it all go together.
The first step to building your dream catamaran begins with a strongback – this is a square frame used to position the temporary frames that will be used to form the hull shape. This frame will be set up and must be square and accurate, a string or laser level can be used to achieve this.
The forebeam is now installed along with the striker attachment fitting, as shown above. The bridgedeck is installed shortly after and taped onto the bulkheads with webs installed, this now completes what is a quite stiff and strong platform to work on.
Now that the bridgedeck is in place, the forward webs and dash will be fitted. At this stage, all furniture and internal work begins, with the main panels left off for ease of access when working.
Material Choices
Schionning material choices, solutions that work best for catamarans & why, our designs are based on cored composite construction techniques using west system epoxy resin and knitted fabrics. but given the range of today's composite technologies, which solution works best for catamarans and why written by jeff schionning, selecting the correct materials, resin choices.
It also fully protects the boat against water absorption and it can not develop the dreaded Osmosis.
We choose ATL Composite’s resin systems for their superior quality, reliability and value for money.
Having worked closely with the ATL Composites team and their products for many years, we know we can stand by their material solutions, and rely on great service should something unexpected happen.
This may not seem important but when working with a material for an extended period of time, the small things make all the difference.
CORES Which One to Use?
End-Grain Balsa – 150kg per cubic metre
Superlight Balsa – 94kg per cubic metre
Western Red Cedar – 360-380kg per cubic metre
Foam – 80kg per cubic metre
BALSA END GRAIN (150 kg/cubic metre)
Balsa has very good values and we can produce a shell using a very light laminate. It will be very stiff and very resilient to fatigue.
It has exceptional qualities including very high compression strength, extremely good sheer capabilities and fantastic sheer stiffness.
Compressive strength is the resistance to collapsing when pressure is applied perpendicular to the surface as when pushing directly onto the material with the point of your finger. Balsa is far stronger than Foam (80kg/cubic metre) in compression.
Balsa is also very strong in shear. This is when the core sample is held flat between your hands, one hand slid one way and the other slid the opposite way, when the core tears through the middle the core has failed in sheer. The amount of stretch you feel before the core shears is shear stiffness. To compensate for sheer weakness the core is made thicker. So 13mm Balsa may be equal in sheer to 19mm Foam.
(80 to 200 kg/m³)
There are many boats sailing that are built from foam as it’s mechanical properties are good for boat building.
Initially one would expect this cat shell to be lighter as it is ½ the weight of Balsa. We do have to compensate for its weaknesses and will then add to the reinforcement the reinforcement on the outside to spread that compression load over more core and need a triaxial type weave to compensate for the veneer content that runs fore and aft on the Durakore.
Secondly, we need to increase the Core thickness to compensate for the shear value, usually neutralizing the weight advantage.
We only use structural foam core that is closed-cell and cross-linked.
The end result using foam core amounts to a very similar total boat weight. Professional builders can achieve a good result but usually use vacuum bagging and very good molds to achieve this.
Secondary Issues
Balsa can absorb water. It needs extreme neglect to rot (very unusual). Water soaks along the end grain quickly. It travels very slowly across the grain. We use balsa under the waterline especially because of it’s high compression strength for beaching etc. any core type must be sealed. Damage to all cores results in the same sort of repair. Notice a damp spot remaining when drying out to anti-foul… simply grind back the surface glass exposing the core, dry it out and re-glass – it’s that easy.
Timber cores are cheaper than Foam in most cases.
A light, high tech cat returns a far better (often 2 – 3 times) re-sale than lower tech materials. Often saving $10,000 on materials initially, loses $200,000 on re-sale – a serious reality.
Our boats can be built using Balsa, Foam or Western Red Cedar. Combine strength, stiffness, lightness and cost, with ease of use – it just makes good sense!
About John P.
One Man's Blog
Specialization is for Insects.
CatamaYak: How to Build a Kayak Catamaran
August 14, 2013 By John P.
We happen to own four identical kayaks, we bought the Equinox 10.4 kayaks at Costco, and we started working on ways to hack them to make them even better! First, I hacked a motor onto my kayak , and then I thought I’d give it a shot and see if we could build a catamaran out of a couple of em.
The CatamaYak Concept
When we go out on the water there is usually a group of us. Some are faster than others, and some just enjoy a leisurely time on the lake. We wanted to be able to turn a couple of kayaks into a floating relaxation station and give it a motor so that a couple of people could simply sit back and relax while still being able to tag along.
The CatamaYak needed to have a few important characteristics:
be light and easy to assemble at the lake
be extremely waterproof and not get slippery
be durable enough to take a pounding from the waves
be rigid enough to deal with the forces encountered
Given the design considerations I took a few measurements and drew up a quick sketch of the components and how I imagined they would fit together.
If you are going to design your own there are a few important things to keep in mind.
The bow (nose) of the kayak is generally narrower than the stern (rear). So don’t just make the front and rear crossbeams the same length or it will look funny and not perform as well.
You could substitute wood 2x4s for PVC in my design, but its not going to last as long and its going to flex and expand as it takes on water. Its also going to be a LOT heavier.
If you intend to add a motor like I did you must make sure that the distance between the two kayaks in the center is sufficient for the motor to turn 360 degrees without the blades hitting the side of the watercraft.
The Kayak Catamaran Parts List
Everything I used for this experiment came from Lowe’s. I’m sure you could also find it at Home Depot or other home improvement stores.
3 – 10′ sections of 2″ PVC pipe
4 – 2″ PVC T sections
4 – 2″ PVC end caps
PVC cleaner and cement
1 – 18″ x 72″ wood board
4 – 2″ stainless steel U bolts with lock nuts and washers
4 – 5″ stainless steel eye bolts with lock nuts and washers
1 – 8′ 2×4 (or a couple of 8″ scraps)
2 – 8″ 5/8×16 bolts with lock nuts and washers
4 – Ratcheting straps
I also needed a rubber mallet, wrenches, a drill, a set of drill bits, and a table saw. You could do without the table saw by having the store cut the wood for you.
Building the Kayak Catamaran
The first thing I did was set the two kayaks beside one another and lay the crossbeam PVC pipes on top of it. This allowed me to take measurements and make sure my design was roughly accurate.
It turns out that the exact finished dimensions worked perfectly for my kayaks and particular brand of trolling motor (Minn Kota 30 pound unit). See the design sketch above if you have Equinox 10.4 kayaks and want to exactly duplicate this build.
I then cut all the PVC pipes and dry fit the pieces. I used my table saw to cut the PVC, but you could use a hacksaw and do it by hand, or you could use a reciprocating saw or basically anthing with a blade long enough to go through 2″ of PVC. Its a very soft material so its easy to cut – but keep your cut very straight as you go. The pieces won’t fit properly if the cuts are all crooked.
Then it was time to attach the pieces. First, you must start with the rectangular center frame, and you have to be VERY careful when assembling this piece to make sure you get it extremely straight!
I carefully cleaned and cemented each fitting and lightly attached a T union to one end of the support frame. I then VERY QUICKLY laid it on the flat piece of wood to make sure the T’s were pointing straight. After a little adjusting I took a rubber mallet and pounded the T’s on as far as they would go.
You’ll know when the pieces are fully inserted because there is a little ridge in each connector or end cap that won’t let the pipe go any farther. So you don’t need to worry that you put it in too far. In fact, if you follow my design its extremely important that all PVC is assembled as tightly as possible for proper fit and structural integrity.
If done right you can look inside the T fitting and see there are no gaps and some of the cement is pretty much sealing all the way around the tube where they meet.
First glue up both end pieces, then attach the two long PVC supports to one end, and follow up by attaching the other end piece – which will require you to glue up two pipes at the same time. Work quickly as the PVC cement drys fast! And remember – HAMMER EVERYTHING TOGETHER WITH A RUBBER MALLET!
After that you’re in the home stretch. Time to glue on the cross beam pieces. These are the most critical joints so make sure they are very clean and you have plenty of cement. You don’t want these to break on the water! Also, notice again that in my design the front and rear are different lengths. Here is a photo showing just one side glued up.
Once you’ve finished connecting all the PVC joints and adding end caps, you can lay the frame back down on your kayaks and begin attaching the connecting hardware. First up, the wooden platform needs to be connected on top. This serves two purposes. First, it provides a lot of torsional rigidity. And secondly, it gives you a spot where you can put stuff!
I used 4 long eye bolts pointing upwards to connect the wood to my PVC frame by drilling down through the wood and directly through the center of each of the 4 T-connectors in the corners. By using the eye bolts it gives connection points in each of the 4 corners that can be used for lashing things to the top, or could even be used for lifting / hanging the platform.
You’re going to attach 4 eye bolts pointing downward from the end of each crossbeam. These are going to be used for connecting the ratcheting strap to hold the kayaks in place.
The other end of the strap mounting is a U bolt mounted directly on the platform. Make sure and leave enough room that the ratchet can be entirely on top when its mounted securely. This does a couple of things, but most importantly it allows you to ratchet it up a little while on the water if it loosens up, which it will do a bit when it gets wet. I’ve already proven out this point on the Lake, so don’t skip it.
You’re about done at this point! Now if you intend to mount a motor on it you need to add a wood block that will fit it. I accomplished this by cutting two 2×4″s down to 8″ wide. These were attached with several stainless steel screws and an L bracket (found near the fencing stuff in the lumber department) for some added rigidity. I wanted to make sure there was NO flex with the motor so all of the power translated to forward momentum instead of any wiggle in the mount.
At this point you should be done and ready to simply slip a ratcheting strap under each mounting point, front and rear, on both Kayaks and secure them tightly.
We took the double Kayak Catamaran out on the lake for the day and it performed FAR better than I ever expected! The little 30 pound Minn Kota trolling motor was able to EASILY push the watercraft! By the way, you need to really watch the video I did about the single Kayak motor mount in order to see how to wire it up and which battery to use, etc. But even with the little trolling motor battery I used we were out on the lake messing around with the motor in use for over an hour and only used 20% of the battery life.
Not only was this rig able to easily push and steer the CatamaYak, but we were able to even TOW both of the other Kayaks without any issue! Amazing.
A couple of last little things. You’ll see in all of the photos that the wood panel in the middle is exposed untreated wood. That’s because we bought some special textured extremely waterproof paint to cover it with, but I didn’t do it before the first trip out to the lake. We’ll be painting it for long term durability soon.
Finally, if you do this, you’re technically changing your kayak into a home built motor boat. And in Texas, and probably most states, you’re going to have to register it as a watercraft. It costs like $30 in Texas to do it, but be warned that if the lake police come by you could be ticketed for taking this on the water without registration. So make sure you’re covered so you don’t worry about it.
Oh, and be prepared for a LOT of attention on the water! Because no one has ever seen anything like this before so they’ll all want to be checking it out!
So, that’s it! I hope you guys enjoy the hack / build. Let me know if you have any questions in the comments below and I’ll help as best I can. This is a project that you can build in just a couple of hours if you have the right tools, and the entire cost was around $100 including PVC, wood, bolts, paint, etc. So that’s a pretty good value!
John P. is a former CEO, former TV Show Host, and the Founder and Wizard behind Texas Metal Works . You can find him on Twitter , Facebook and LinkedIn . Feel free to send shoutouts, insults, and praise. Or Money. Money is good.
May 11, 2016 at 9:30 pm
This is awesome! I am with Robert on the straps..confused about the role of the U bolts. I thought the ratchet strap hooked back to the platform eye bolt. Please clarify. By the way John, why did you take yours apart?
May 12, 2016 at 10:32 am
I used the u-bolts on the platform so that the base of the ratchets could lay flat against the wood once everything was tightened up. This way when you’re on the water you can use one hand to ratchet it tighter if need be.
You may be able to use the same I look somewhere and put both ends of the ratchet on it. You just want to make sure that you have enough room for the straps to Route Around everything and still be accessible when you’re on the water. It could be fairly disastrous to have anything separate with your stuff on that Central platform. It would pretty much just think…
I disassembled mine because I wasn’t going to register it as a watercraft, and it takes up too much room in the garage for something I’m not using constantly. If we had a lake house I would have definitely left it hooked up. It was great! :-)
December 14, 2015 at 5:37 pm
This is something I have been wanting to do for a long time. Great instructions. One thing that isn’t clear to me is how the ratchet straps attach to the u-bolts. Could yo show a top view picture to make it easy to see? Thanks.
January 5, 2016 at 10:59 pm
Sorry Robert, I took it apart a while back so I can’t take a photo any more. But since the ratcheting straps have hooks on them, as long as you get them hooked into the eye bolt and just tighten them up, they’ll stay! :-)
April 10, 2015 at 10:53 am
Great modification! I have 2 identical Perception Sport Pescador 120 kayaks and this has definitely inspired me to build a similar setup. I also own a Hobie Adventure island and love the extra space gained from the trapoline sides between the kayak and the amas (just like your wooden platform has done). You could also add additional cargo space to the void formed between the wooden platform and the front of the two kayaks from a lightweight water repellent material. Great work, thanks for sharing!
July 14, 2014 at 9:27 am
I wanted to say thank you for posting this project. My son is handicapped and i had wanted to take him our on my kayaks and could not imagine how to make it safe for him to enjoy. This is perfect. We even got a thumbs up from the Vessel Assist Boat Crew on our Maiden Voyage. The stability is amazing even in Lake Washington with the chop and larger motorized vessels. Your measurements were spot on for our boats. High Five! Would love to share a pic. This has opened up a whole new world to a boy and his dog. Thank you!
July 23, 2014 at 11:30 pm
Yeah! I’m so happy to hear that this was helpful! :-)
August 15, 2013 at 8:33 am
That definitely seems easier than I thought.
August 14, 2013 at 2:40 pm
I was going to say if John built it a Catastrophe but it looks pretty good. Cali has large feet or John has small ones. :)
August 14, 2013 at 1:10 pm
BOAT and CANOE KITS USA for StorerBoats, Precut Plywood, Epoxy, Glass, Sails.
JO Woodworks make and ship boat and canoe kits for Storer Boat Plans in the USA. From precut plywood to the works. We specialise in Sailboats, sailing canoes, paddling canoes and electric canoes.
We use quality materials and ship to the Lower 48 states and far beyond.
Our boat kits can be any level you request, precut Plywood Panels, plus timber, plus sails.
For any boats listed below but without links use OUR CONTACT PAGE
Boat and Canoe Kits for Michael Storer Boat Plans
Mini Outriggers for Sailing Canoes and Narrow Dinghies – Allow experts to be more adventurous and learners avoid some capsizes. Outrigger hulls and crossbeam only .
Viola 14 Sailing Canoe Kit – A light 14′ sailing canoe that sails like a performance dinghy – modern and lug rig options
Storer Quick Canoe Kit – a simple canoe kit that performs well and can be built in two or three weekends.
Kombi Sail and Paddle Sailing Canoe Kit – A canoe that paddles and has excellent sailing performance. Good as a two person touring canoe or a one person performance sailing canoe.
Oz Goose Sail Boat Kit – A stable, simple and affordable sailboat with excellent performance
Drop In Outriggers Kit – Make a canoe or narrow dinghy into an awesome sailboat or make an unstable boat easier to sail.
Quick Canoe Electric Kit – A light cargo canoe kit for efficient speed with an electric trolling motor or small outboard
Kits – In house PDRacer adaptations by J.O Woodworks
Texas PD Racer Sail Boat Kit – Developed to fit the class rules of the Puddle Duck Racers. A very smart performer with two rig options.
JO Woodworks have been building boats and boat parts for 25 years and building quality furniture for 40. John Owens
What is in our Boat and Canoe Kits
Our kits have all the plywood pieces cut out to shape.
There are several options:
Complete boat or canoe kits with plywood components cut to shape, all timber, fiberglass, epoxy, sails and more.
Foil kits preshaped for the centreboard or leeboard and rudder blades
Plywood components only kits
Plywood components precut plus all timber
To Order a Boat Or Canoe Kit or Discuss Options Phone (USA) : 903-894-6293 Email: [email protected] Facebook Messenger: Facebook Message
Our goal is for you to only make simple cuts that can be done with an inexpensive handsaw.
The only exception to this is that occasionally there is one that has to be cut to fit a special location that just can’t be done ahead of time. These pieces are cut oversized so they can be trimmed and fit accurately.
We include all the timbers you need to build the boat including any temporary items. Such as spreaders to push the sides of the boat apart while building if required in the plans.
Some of the timbers are cut to length but most are left long for you to cut to an exact fit.
Why Start with a Boat Kit?
You might ask yourself. Why should I spend the extra money to buy a kit when I can go down to the local lumber yard and get everything I need?
That is a good question so here’s my answer.
The simple answer is, IT GETS YOU ON THE WATER FASTER. But three good additional reasons below.
1/ Building a boat from scratch is very rewarding and just plan fun! There are many out there, however, that have never done any serious woodworking so want a head start so the building goes quickly.
2/ Building a boat is a great family project. A well thought through boat kit will eliminate all the tedious layout work that makes most children bored and lose interest.
3/ We have already spent the time to tweak the shapes so they fit together properly. The boats will go together easily and before long you will be painting or varnishing and getting out on the water to use it.
Joining Timber – precut joints and a simple jig to glue up straight.
If pieces need to be scarfed together due to the length we have taken care of that cut too. A jig for gluing up the scarf joint will also be included in the kit.
Labelling all the Boat Kit Components
All pieces have labels on them so you know what they are. We also include the dimensions on many of the labels just in case a label happens to separate from the wood during shipping.
Epoxy and Fiberglass
We supply Epoxy and Fiberglass for the comprehensive kit. We can also supply to any level that you want. With or without these items.
Ropes, Fittings and Sails
We can supply these items at reasonable prices as well. Please be aware that while we endeavour to have sails available quickly, at some times of year there can be delays because of high demand.
Shipping Kits Throughout North America.
Our kits are created in a way that they can be shipped by UPS Ground to the lower 48 states. This saves money and time for you plus eliminates the problem often created by trying to get a large truck to a residence. Especially if you live in a rural area like I do.
We work with the boat designer for any modifications that this might require from their original plans.
We Supply Plans or you can buy from Duckworks
Plans for most of our boats can be purchased either with our kits or through Duckworks Boat Builders Supply.
We do include information for piece locations to ease your construction. As mentioned above, we will have fiberglass and epoxy kits for our boats that can be shipped to you or you can order specific items for yourself.
Duckworks is your best source for fiberglass and epoxy as well as various hardware items you may need for your new boat. Chuck and Sandra are very helpful folks and have built many boats themselves. So they know what you are accomplishing and will help in everyway they can.
Contact Details for JO Woodworks.
If you need more information, please contact me.
John Owens 870 C.R.3812 Troup, Texas 75789 Phone: 903-894-6293 Email: [email protected] IM : Facebook Message Why Build From One of Our Boat or Canoe Kits.
See our Current Work … … or drop us a line on Facebook.
Our Facebook photos of current work are here.
Canoe Sailing
Kayak Sailing
Dinghy Sailing
Snark Car-Topping Sailboats
Canoe Stabilizers (Outriggers)
Rowboat & Porta-Bote Sailing
Parts and Accessories
Boats (without sail rigs)
Motor Mounts
Portage Carts
Small Outboards
Specialty Boats
Shopping Guide
Testimonials
Kayakamaran
One sail rig for two kayaks makes a catamaran!
See Item 6008 for the basic kit. For Deluxe and Super Deluxe packages see item 6010 and item 6011 .
Customer Feedback
"Hello,I just want to tell you that I had a great weekend of sailing my kayakamaran!" Ellen (June 2014)
"Hi Jim & Betty,
We took our new Kayakamaran out for a nice sail at a local lake which was totally not suitable for sail boats! But the large Lateen sail still had us trolling right along at over a knot!! And the few spots where the wind got down to us we really took off!! :)
Thanks again, Smitty!! " (August 2022)
"Subject: Fun, Fun, Fun!
My wife and I are enjoying sailing with the kayakamaran sail kit. It is a lot of fun. - Dave L." (June 2010)
See the Many Configurations You Can Create With The Kayakamaran Sail Kit
Two different hard-shell kayaks.
Two identical hardshell kayaks.
Two different inflatable kayaks.
See Kayakamarans in action with these video links:
Click Here for another video clip of the above kayakamaran in action..
And Here for a whole folder of video clips you can watch.
More Photos
Why is this better than the sail rig on one kayak? (a) More room. (b) More stable, which also means it's faster because the mast stays more upright, presenting more sail area to the wind. Consider getting the Super Deluxe Package that makes a Kayakamaran or a sail kit for just one kayak -- use it as a kayakamaran in the morning and a single-kayak sail kit in the afternoon, for example.
The Ultimate Boatbuilding Experience: Build this handsome Sit-On-Top from a kit!
14ft Long, Excellent Stability, Dry Cockpit with Scuppers.
Stitch and glue Construction, Plywood-Epoxy, Everything included
CNC-cut Okoume Marine Plywood
Epoxy Resin, Fiberglass Cloth, Wood Flower
Plan Set and Assembly Manual
Seat, Foot Rests, Deck Hatches, Hardware
Plastic Ties, Filleting Tool
Description
Additional information
With the purchase of this kit, you will receive:
CNC precision-cut Okoume marine plywood parts to assemble the boat
CNC-cut temporary frames
96″x3/4″x3/4″[2500x18x18mm] (4x) Western red Cedar or similar for sheer clamps
12″x3/4″x1/2″[300x18x12mm] (±20x) Western Red Cedar or similar for cleats
4″x1-1/2″x1-1/2″[100x38x38mm] (4x) Western Red Cedar or similar for scuppers
1 gallon [4l] of epoxy laminating resin
1/2 gallon [2l] 2:1 epoxy-activator
5Qt [5l] of wood flour
10 yards [9m] of 4oz/sq.yd. Fiberglass cloth
40yd [36m] 6oz cloth tape x 2″wide
10ft [3m] carbon tow
Seat and backrest. You choice of basic or premium (select at check out). Kayak shown in pictures with Premium Seat
Harmony keepers foot braces (or equivalent, depending upon availability) NOTE: Braces shown on picture are not the ones that come with the kit
6″ Hatch Cover Deck Plate (2x)
Nylon webbing, bungee chord and hardware
Plan set (excluding full-size templates)
Assembly manual
BYD bow stickers
What is NOT included in the kit: Varnish and paint, as this varies by builder’s preference
*We cut the F1430 kits on demand, so kindly allow us two weeks from purchase date to get your kit assembled and ready for shipping, or contact us to discuss your specific timeline requirements.
**The shipping charge applied at check-out is only an estimate intended to speed up the checkout process and is the amount we’ll hold on your credit card, but we’ll only charge you the actual shipping charge + $5 for S&H, once this is determined, either via final capture or refund. Prices and kit content can change without notice. Contact us for a precise shipping quote before ordering. Shipping fees are out of our control, it is therefore understood that shipping price could potentially be higher than the amount held on credit card. In this case, we will contact you to validate before applying any charge to your CC.
Weight
55 lbs
Dimensions
97 × 30 × 2 in
Kayak Seat
Basic seat, Premium seat
Related products
15′ RoG Micro-cruiser plywood kit
Sponge Docks Skiff 13 Wood components kit
Sponge Docks Skiff 19 CNC-cut components
Assembly Manuals
F1830 Sit-On-Top Kayak Assembly Manual
Sponge Docks Skiff 13 Complete Kit
Sponge Docks Skiff 16 CNC-cut components
Sponge Docks Skiff 19 Complete Kit
Username or email address * Required
Password * Required
Captcha *
Remember me Log in
Lost your password?
James Wharram Designs
Search Our Site
Mana 24 - self-assembly 'cat-kit', wharram's first kit boat.
Introducing the CNC-cut self-build 'Cat Kit', a trailable family camping boat. All plywood parts are pre-cut - just take it out of the box and assemble it yourself! Keep it at home, trail it and sail it anywhere. MANA is the Polynesian word for 'spirit' given to an object by its maker or the person that uses it.
An Economical Way To Enjoy Sailing
Due to the present period of financial austerity and increasingly high marina costs, a large number of would-be sailors are having a hard time financing the dream of sailing their own boat.
However, there is an economical way to enjoy sailing, by building your own small lightweight boat, keeping it at home and trailing it to the waters you want to sail in , chasing the good weather. This gives the opportunity to explore many more sailing areas than if based on a permanent mooring and at a much lower cost.
In designing the MANA, we explored this idea and looked sideways into the world of camping and have combined the innovative CNC cut "flat pack" boat-building concept with the philosophy of outdoor living to create the unique MANA camper-sailer, specifically designed for trailer sailing.
All these ideas have come together, resulting in the new MANA 24 design, a catamaran specifically designed for trailer sailing. The MANA kit is sold with all the plywood cut out by CNC cutter , so building the boat at home will be a bit like assembling a flat-pack . All the parts slot together perfectly so a hull can take shape in a day.
Building from such a kit takes away the worry of measuring and cutting all the boat parts, which can be quite daunting to many first time builders and saves a lot of time in the early stages of building. As she is built from a pre-cut kit, we have been able to give the Mana more complex and beautiful shaping , giving her more interior volume than the Tiki designs. During construction all the kit parts slot together and are locked with wooden wedges, so no room for error. Even all the stitch holes (for fastening joints with cable ties) are drilled and lines scribed where to glue on bearers and stringers.
MANA's 23'6" hull length has a special significance for James Wharram . In 1956 he made the first successful catamaran voyage across the Atlantic in his first catamaran, the 'Tangaroa', also 23'6" long.
In trailer/sailer design every increase in length equals harder launching and recovery work. At 23'6"- 7.15m hull length MANA 24 sits between our TIKI 21 and TIKI 26 designs (both very popular trailer sailers), with easier launching and handling like the smaller TIKI 21, but an interior space close to that of the Tiki 26 . Her new chined hullshape gives more width for the bunks, which are placed aft where the hulls are widest, and where there is least motion.
For speedy assembly the hulls and beams of the MANA are connected with quick-fit webbing straps with over-centre buckles, which are very strong and much easier to fit than bolts.
With the main mast of the MANA placed well forward the platform gives ample flat space for a low cost dome tent or a custom-made pramhood tent, which can double as spray hood when sailing. Adapting camping habits to a sailing lifestyle gives wider sailing opportunities at minimum cost and lots more family fun!
MANA uses the well proven Wharram Wingsail rig in a new Catrig configuration. The Wingsail rig is a modern version of a high aspect Dutch style gaff rig, sleeved round the mast for maximum aerodynamic efficiency.
In this new Catrig configuration the mainsail gives the drive with a very clean leading edge. The small mizzen aids with balance, steering and tacking . Having no jib, there is no need for a very tight forestay. The standing rigging uses the latest dyneema rope, which is light and easily set up. The mizzenmast can be used as sheer pole for single-handed assembly.
Mana 24 Design Data
Building Method:
Ply/Glass/Epoxy/Laminate
Length Overall:
23' 6"
7.16 m
Beam Overall:
12' 8"
3.85 m
Waterline length:
20' 10"
6.35 m
Beam of each hull:
3' 2"
0.97 m
Max draft:
18.5"
0.47m
Headroom over seat/bunk:
3'
0.90 m
Sleeping capacity:
2 single bunks in hulls, double birth under decktent
Dry weight (approx):
1190 lbs
540 kg
Maximum displacement (Approx):
2510 lbs
1140 kg
Sail area:
216 sqft
19.6 sqm
Deck sleeping area:
7'3" x 8'
2.20m x 2.45m
Full deck area:
7'3" x 11'6"
2.20m x 3.50m
What You Get In A Mana Kit
CNC cut plywood parts, timber parts, epoxy materials, fastenings, ropes, blocks and fittings are all included in the kit. See the price list .
Transporting The Mana Kit
The entire kit can fit and be transported in the back of a van with ease. The van in the photos is a VW Transporter.
Boat In A Box
Your Mana 24 kit will arrive in a box like this!
We're Taking Orders
The Mana 24 kit is now available and we are taking orders. We will be handling each order individually due to different options and shipping costs, so if you would like to discuss ordering a Mana kit, please contact us , we will then be able to work out shipping details to your building site and supply you with a pro forma invoice.
Cost of complete kit, including all fittings, masts and sails is £12,750 (if bought complete, separate costs below). All prices excluding VAT, and excluding shipping costs (shipped FOD, Freight on Delivery).
If your budget is tight, it is possible to buy the kit in two stages , buying masts, sails, rigging, ropes and fittings later. Or you can buy just the basic Boatbuilding Kit which includes the building rights and plans, and source fittings, rope and fasteners yourself as all are detailed in the plans.
1. Boatbuilding Kit - Total Cost £9,975
Complete set of plywood parts to build two hulls, crossbeams and motorbox, CNC precision cut. All plywood Robbins Elite BS1088 Marine Plywood, guaranteed for 15 years, manufactured from selected Gaboon (Okoume) veneers throughout
Platform panels, 2 large, 2 small, prefabricated from 40mm plastic honeycomb, glassed top and bottom
Small hardwood timber parts, CNC cut to size, ready for final shaping, sanding and fitting
Perspex windows and washboards, CNC precision cut
WEST Epoxy kit, includes all resins * , pumps, fillers and glass cloth, mixing sticks, 1 box vinyl gloves, 1 rubber squeegee
Sikaflex 295 for fitting windows
Sikaflex 221 for bedding fittings etc
Neoprene rubber for sealing hatches
Rubber for padding beam mounts
Gripfast nails, stainless steel machine screws, cable-ties and roller-sleeves (to be cut into paint/epoxy-pads), 2 paint-pad handles.
Douglas Fir timber for stringers, framing etc and hardwood for hatch coamings (mahogany) and keel strips (iroko), all in long lengths to be cut to size by builder *
* N.B. For overseas customers Boatbuilding Kit should be bought excluding the long lengths of Douglas Fir and hardwood timber for easier transport. Cost deducted by £1100. We can also not include the epoxy resin and hardener as these are hazardous products with freight restrictions. You will need to buy these through your local dealer. Cost for these deducted by £900. (i.e. Cost of Boatbuilding kit excl. long timber and epoxy £7,975).
2. Blocks, Fittings And Rope Kit - Total Cost £1,200
All blocks, cleats, shackles and other fittings to rig the Mana
All ropes for sheets, halyards, lanyards and standing rigging (Dyneema)
Stainless steel buckles and webbing straps for crossbeams
Shockcord for tillers and hatches
Aluminium boathook/mizzen boom
Set of fittings for both mastheads and hinging unit for base of main mast, fabricated from aluminium and stainless steel
3. Sails, Made By Jeckells Of Wroxham - Total Cost £1,530 (Specify Colour)
Mainsail with two reefs
Mizzen with 1 reef
4. Masts * - Total Cost £510
Aluminium mast tubes. 4 ½” OD x 10swg for main mast, 2 pieces @ 5m and 2.30 long, plus sleeve. 3” OD x 10swg for mizzen, 4m long.
* N.B. For overseas customers we suggest you source your mast tubes locally as shipping long lengths will be costly.
Building Time Estimate
We kept precise building hours while building the prototype. We built to a high quality standard with excellent finish, i.e. a lot of time spent on precision sanding, fairing etc. Building time in the early stages of building is greatly reduced by the CNC cut plywood parts, which takes away all the worry of measuring and cutting and lets the builder assemble the hulls very quickly.
Summing Up Of The Times We Took
All construction work; hulls, beams, gaffs, tillers, hatches, including epoxy coating all interior surfaces: approx. 500 hours
All exterior glassing work; hulls and crossbeams: 90 hours
All sanding of glassed surfaces: 45 hours
Painting, two coats epoxy primer, two coats 2-pack topcoat incl. non-slip decks and antifouling: approx. 80 hours
N.B. What should be noted is how many hours it takes to do sanding and painting compared to the building time. Glassing, sanding, fairing and painting add up to 30% of the total building time. On our basic building time estimates in our Design Book, final finishing and painting are not taken into account. Working from a kit does save many hours.
Transport Sizes And Weights
The plywood kit, including made-up platform panels will be in labeled bagged bundles measuring in total approx. 2.5m x 1.20m x 0.3m and weighs around 300kg
Fastenings, blocks, fittings and ropes, 1 box, approx. 60 x 40 x 30cm . Weight 25kg
The WEST epoxy kit measures approx. 1.3m x 0.6m x 0.45m and weighs around 100kg
For overseas transport the above items have to be packaged in one special wooden pallet crate - 2.62m x 1.29m x 0.77m - at additional cost of £250.
Timber will be a long parcel (around 3.5m - 4m long) and will weigh around 50-60kg
Aluminium masts, in max. 5m long sections , weight incl. fittings 40kg
For overseas customers we advise them to source the timber and masts locally.
You will be able to collect the complete kit from Cornwall, UK yourself on a trailer or in a van saving on a lot of shipping costs and paperwork.
Interested in building a Mana? Contact us now:
Expandacraft
Photo Gallery
Video Gallery
Request a Quote
Pricing and Shipping at a glance
12′ Outrigger Kit – 2 sided
$ 1,230.00
Outriggers to stabilize your kayak or canoe. Expandacraft Outrigger Kits come in 2 lengths for one or two sides.
10 in stock
Description
Additional information.
Reviews (0)
This 12 foot outrigger kit for 2 sides includes:
4 bow/stern sections
4 low or high risers
2 six ft aluminum cross tubes with holes drilled on both sides
4 nylon bolts and cotter pins (quick release system)
4 plastic end caps for aluminum crossbeams
4 wood keeper pegs
Option to upgrade to 8 foot or 8 foot spliced cross tubes available at an additional cost.
Does NOT include decking or anything shown on the decks in photos. Aluminum decking is available for additional purchase at $85/plank measuring 6′ x 11.5″. We have seen customers rig 1-3 decks on one side depending on their set up. Please specify in your order request form if you would like to use Expandacraft deck planks and how many you want.
Note: Since kayaks and canoes come in a wide variety of shapes and sizes, we recommend you read our How to choose the right outrigger for me post and watch related videos: here and here .
Weight
75 lbs
Dimensions
24 × 24 × 60 in
Color
Yellow, Sand, Blue, Green, Red (special order), Orange (special order), Black (special order), Pink (special order), Purple (special order)
There are no reviews yet.
Your review *
Name *
Email *
Save my name, email, and website in this browser for the next time I comment.
Related products
16′ Outrigger Kit – 2 sided
Canoe Connector Kit, pair
21′ Tri-hull Expedition Boat
16′ Outrigger Kit – 1 Sided
Cart is empty
Comparison list
Select Product Category
8.6' Inflatable Dinghy Boats SD260
9.6' Inflatable Dinghy Boats SD290
11' Inflatable Dinghy Boats SD330
11' Inflatable Boats SD330W
11' Heavy Duty Boat XHD330
12' Inflatable Boats SD365
13' Inflatable Boats SD385
13.8' Inflatable Boats SD415
14' Inflatable Boats SD430
15' Inflatable Boats SD470
16' Inflatable Boats SD488
18' Inflatable Boats SD518
9.6' Fishing Inflatable Boats FCB290
14' Heavy-Duty KaBoat FKB430
10' Heavy-Duty Boat FB300
12' Heavy-Duty Boat FB365
13' Heavy-Duty Boat FB385
14' Inflatable Heavy-Duty Boats HD430
9.6' Inflatable Slatted Boats SB290
9.6' Inflatable Budget Boats CB290
11' Inflatable Budget Boats CB330
12' Inflatable Budget Boats CB365
9.6 Azzurro Mare Inflatable Boats AM290
11 ft Azzurro Mare Inflatable Boats AM330
12' Inflatable KaBoat SK396
14' Inflatable KaBoat SK430
15' Inflatable KaBoat SK470
13' Heavy-Duty KaBoat SK385XL
15' Heavy-Duty KaBoat SK470XL
16' Heavy-Duty KaBoat SK487XL
13' Performance KaBoat ZK380
14' Performance KaBoat ZK430
12' Folding Aluminum KaBoat KA365
11.5' Frameless Cataraft CR350
13' Frameless Cataraft CR385
12' Light Inflatable Rafts RD365
9.6' River Inflatable Rafts RD290
12' River Inflatable Rafts RD365XL
13' River Inflatable Rafts RD385
12.5' Heavy-Duty Fishing Raft FR380
12.5' Heavy-Duty River Raft FR380XL
13' Whitewater Inflatable Rafts AMR385
8.6' Portable Inflatable Kayak
11' Inflatable Hybrid SUP Kayak
13.5' Paddle Board / Kayak
12' Motor Board SUP Skiff
12' Budget Inflatable Kayak IK365
13' Fishing Motor Board SUP
12' Extra Heavy-Duty Fishing FIK365
13' Fishing Light Kayaks FK396L
13' Fishing Inflatable Kayaks FK396
14' Ocean/River Inflatable Kayaks OK420
12' Inflatable Pedal Kayak PK365
12' Inflatable Fin Pedal Kayak FPK365
Compact Pedal Drive
Electric Fin Motor For Kayaks and SUPs
Catamaran SUP Frame
9.6' Cargo Trailer Boat
11' Inflatable Catamarans MC330
12' Inflatable Catamarans MC365
Inflatable Boat Lifting Tabs
Saturn Dry Bags
Inflatable Fenders
Floating Dock Container
Inflatable Floating Dock
3HP Parsun Electric Outboard Motor
55 Lbs Electric Trolling Motor 12V
Hangkai 6HP Outboard Motor
Rudder System for Kayak
Central Console For Boat
Seating Frame For Boats, KaBoats, Rafts and Kayaks.
Rowing Frame for 2 People
Aluminum Fishing Chair
Deluxe Sport Fishing Kayak Seat
High Pressure Hand Pump
Digital High-Pressure Electric Pump w/Battery
NEW PRODUCT - COMING AROUND OCTOBER
Description
More Pictures
Attachments
Inflatable Platform to Join 2 SUPs into Catamaran.
Convert 2 paddle boards into an electric catamaran..
Transform Your Paddle Boards into a Sleek Catamaran with Our Inflatable Platform!
Elevate your water adventures by converting two SUP paddle boards into a powerful, electric catamaran. Our upgraded inflatable drop-stitch platform replaces the old aluminum frame, offering quicker assembly and disassembly without sacrificing functionality.
Perfect for leisurely cruising or fishing, this inflatable platform is designed to seamlessly join two paddle boards, creating a stable, catamaran-style vessel. It's incredibly easy to inflate, install, and deflate, and comes equipped with a folding plywood transom to accommodate an electric trolling motor.
Key Features:
Versatile Seating: The platform includes two built-in back supports, but for those who prefer a custom setup, you can easily remove them and use your favorite beach chairs instead.
Stability & Capacity: Ideal for two people, yet capable of supporting up to four, thanks to the impressive buoyancy of the combined paddle boards and platform. Once fully assembled, it’s nearly impossible to flip over and extremely rigid.
Secure Attachment: The platform attaches to the paddle boards using provided tie-down straps, which run under the hulls and secure to D-rings on the platform. A foam layer on the bottom ensures a non-slip experience.
Enhanced Performance: For added rigidity, inflate the paddle boards to 60-80%, secure the tie-downs, and then finish inflating. This minimizes any movement, ensuring smooth performance even over waves.
Customization Options: Install an electric trolling motor (up to 1HP) on the motor mount, and secure a cooler or battery in the middle using the provided tie-downs or bungee cords.
Whether you're seeking a relaxing cruise or a sturdy fishing platform, this inflatable platform transforms your paddle boards into the ultimate catamaran experience.
SPECIFICATIONS:
1100 denier, UV and abrasion resistant 9mm PVC Material.
80mm drop stitch, same as air floors in inflatable dinghy boats.
Motor mount for trolling motor.
Built in back supports for comfortable sitting.
Scotty mount for rod holder or other accessories installation.
Multiple handles for easy carry.
2 valves for faster deflation.
PRODUCT DIMENSIONS
Approx Length: 40"
Approx Width: 60"
Thickness: 4"
Chair width: 18"
WEIGHT: approx 25 lbs
MATERIAL: 1100 denier UV resistant PVC
MAXIMUM CAPACITY: 2 - 4 passengers.
INCLUDED: hand pump and all straps to install over 2 SUPs.
Trolling motor, battery, paddle, carry bag - not included.
Video of SUP Catamaran Platform using similar 140mm drop stitch.
Old aluminum frame to convert 2 inflatable SUPs into catamaran.
Assembly Instructions:
1. Inflate Components: Begin by inflating both SUPs and the platform to the recommended pressure.
2. Position the Platform: Place the platform over the paddle boards, ensuring it is centered.
3. Secure with Straps: Run the four provided straps under the hulls of the SUPs and secure them to the four lashing tie-down locks on the platform. Pull the straps tightly to ensure the platform is firmly attached to the top of the paddle boards. Double-check that the locks are fully engaged.
4. Adjust Motor Mount: Unfold the motor mount and adjust the lashing tie-down to ensure it is in a vertical position. The shaft of the trolling motor should rest on the outer edge of the platform, with the motor propeller positioned clear of the inflatable SUP surfaces.
5. Safety Check: Always wear Personal Flotation Devices (PFDs) while using the platform.
6. Adjust Back Rest: If needed, you can increase the recline angle of the backrest by releasing some air. The backrest doesn't need to be as firm as the platform and can be softer for added comfort.
Quick Tip: For optimal rigidity:
Option 1: Install the platform on top of the SUPs while they are slightly under-inflated. Once the platform is secured, fully inflate the SUPs. The boards will expand, creating a highly rigid structure.
Option 2: Alternatively, install the slightly under-inflated platform on fully inflated SUPs, secure the straps, and then add more air to the platform. This will allow the platform to expand further, enhancing rigidity.
IMPORTANT: Please email with questions before ordering, is something is unclear.
Two Canoe's made into a Catamaran with a bolt on frame
Build a catamaran with two kayaks.
Catamaran Kit For Kayak ~ pontoon boat plans aluminum
kit to make a catamaran from two kayaks
Catamaran System
Our version of a sturdy catamaran with two kayaks , powered by electric
VIDEO
Canoe Sail Kit from SailboatsToGo.com Flies Across Lake
Pacific Voyaging Canoes sailing near Hanalei, Kauai, Hawaii
[РВ] Катамаран «Каскад 2» (краткий обзор, сборка)
Old Town Ocean Kayak Malibu Two & Malibu Two XL 2023
2 Kayaks + 1 sail kit = The Kayakamaran
Outrigger canoe manouverabillity and acceleration test. Expandacraft
COMMENTS
Marrying two different sized kayaks into an awesome catamaran ...
This Part2/2 features the custom designed SS fixture for the shorter Pelican kayak to address the kayak height differences. The SS pipe catamaran frame is al...
Catamaran Kit Process
STEP 4. The fairing is now complete, this is done using a filler compound mixed with our West System epoxy resin and applied to the surface of the hull. This process is to ensure that when painted the boat will have a smooth and glossy appearance, and as a general rule the more painstaking the paint-job and fit-out, the higher your resale value.
Canoe Lashing Bars, join two canoes to make a catacanoe
Product Description. Join two canoes together (they may be different) to create a super stable platform to fish, motor or sail on big waters. System consists of 2 telescoping tubes in sections less than 4 feet each and 8 clamps. System joins the canoes in 2 separate places, with adjustable amount of space between them.
How to Make a Catamaran Out of Two Kayaks? Here's What You Need to Know
Short Answer. Making a catamaran out of two kayaks is actually relatively simple and can be done in a few steps. First, you'll need to attach the two kayaks together using either rope or straps. Make sure the kayaks are well secured together and evenly balanced.
Schionning Advanced Build System
The Best Advanced Build System in the World. The Schionning Advanced Build System are one of the simplest ways to build your own boat, or have a custom design built faster and more accurately by a professional. Utilising DuFlex panels with a balsa core, large sheets are joined on their long edge to form full length hull panels, bulkheads etc ...
Kayak & Canoe Sailing Rig: Ultra-Light, Easy to Assemble and Launch!
The CLC SailRig is available with three different sails, to suit different boats, conditions, and skill levels: SailRig 40: A 40sq.ft sail is more than enough for fast sailing in solo kayaks and canoes. SailRig 55: The 55sq.ft sail is a good fit for most double kayaks, or for pushing single kayaks a little harder.
How To Rig a Canoe Catamaran
Food & Drink. WhiskeyBeerRecipesCocktails & SpiritsHealthy FoodWine. Windbound with a big lake crossing ahead, the crew decide to rig a canoe catamaran.
Rigging: Catamaran Loop Kit
Rigging: Catamaran Loop Kit. $13.50 USD. Choose Kit. Quantity. Add to cart. This plastic plate, pad eye, fastener and bungee cord combo gives you everything you need to build a pair of attachment points for our kayak/pack canoe catamaran system. On the pack canoes it doubles as an attachment point for the removable backrest in the stern and ...
Sailboats To Go » Canoe Sail Kits. Easy Clamp-on Design
This page has our canoe sailing product catalog at the very bottom of the page. There's lots to explore. Enjoy! Contact Us: Call 1-888-Joy-Sail or 1- 978-263-7598. Email: [email protected]. Our Sailing Canoe rigs fit virtually every make of canoe. Installs quickly and easily, sails fast and easy.
Canoe Catamaran
1) Canoes generally aren't used for catamaran hulls because they can take on waves/water and list/sink/capsize. If you're going to sail this thing in anything with over foot-high waves, you need to make the hulls shed water. Maybe try the FRP solid (sit-on-top) kayaks that have no interior.
Wharram Mana 24 Catamaran
Wharram Mana 24 Wood Parts Only Kit view contents. $7444. Additional Components: Wharram Mana 24 Timber Only Kit view contents. $1325. Wharram Mana 24 Platform Material Only view contents. $925. Chesapeake Light Craft has teamed up with James Wharram Designs to offer a kit for the stitch-and-glue Mana 24 catamaran. James Wharram and his partner ...
Expandacraft
2 sided outrigger kit for kayak/canoe - 12 or 16 foot. Paddlecats - 12 or 16 foot. Storage and transport options. ... pedal power, and more. Being modular, the Expandacraft will live up to its name. The constant development of new kits will help you expand your enjoyment on the water. Expandacraft quickly breaks down to fit inside a small car ...
Fusion Kit Catamarans
The Fusion 40 "Kit Cat" is revolutionising the boatbuilding industry. This vessel has been designed from the beginning as a high performance cruising catamaran that can be stacked into 40 foot containers and freighted anywhere in the world. This photograph shows the infusion moulded components as they would appear when removed from the container.
canoemaran
homemade canoe's connected to make very stable fishing/cruising/swimming platform. Canoe's are 16.5' long and 2' apart at center. Nissan 2.5 hp outboard at r...
Our Catamaran Build Kits
Schionning Designs supply a list of the Kit Materials you will receive to start the process., catamaran-build-kit-materials, catamarandesign, compare schionning catamaran designs, ... The internal furniture is now installed, if you chose Kit Option 2, this furniture will be pre-cut to your previously decided upon layout. If you chose to receive ...
CatamaYak: How to Build a Kayak Catamaran
4 - 2″ stainless steel U bolts with lock nuts and washers. 4 - 5″ stainless steel eye bolts with lock nuts and washers. 1 - 8′ 2×4 (or a couple of 8″ scraps) 2 - 8″ 5/8×16 bolts with lock nuts and washers. 4 - Ratcheting straps. I also needed a rubber mallet, wrenches, a drill, a set of drill bits, and a table saw.
BOAT and CANOE KITS USA for StorerBoats, Precut Plywood, Epoxy, Glass
Plywood components only kits. Plywood components precut plus all timber. Sails. To Order a Boat Or Canoe Kit or Discuss Options. Phone (USA) : 903-894-6293. Email: [email protected]. Facebook Messenger: Facebook Message. Our goal is for you to only make simple cuts that can be done with an inexpensive handsaw.
Sailboats To Go » Katamayak
Kayakamaran. One sail rig for two kayaks makes a catamaran! See Item 6008 for the basic kit. For Deluxe and Super Deluxe packages see item 6010 and item 6011. Customer Feedback. "Hello,I just want to tell you that I had a great weekend of sailing my kayakamaran!" Ellen (June 2014) ==========. "Hi Jim & Betty,
F1430 Sit-On-Top Kayak Kit
In this case, we will contact you to validate before applying any charge to your CC. Weight. 55 lbs. Dimensions. 97 × 30 × 2 in. Kayak Seat. Basic seat, Premium seat. The Ultimate Boatbuilding Experience: Build this handsome Sit-On-Top from a kit! 14ft Long, Excellent Stability, Dry Cockpit with Scuppers.
Mana 24
MANA's 23'6" hull length has a special significance for James Wharram. In 1956 he made the first successful catamaran voyage across the Atlantic in his first catamaran, the 'Tangaroa', also 23'6" long. In trailer/sailer design every increase in length equals harder launching and recovery work. At 23'6"- 7.15m hull length MANA 24 sits between ...
12' Outrigger Kit
This 12 foot outrigger kit for 2 sides includes: 2 centers. 4 bow/stern sections. 4 low or high risers. 2 six ft aluminum cross tubes with holes drilled on both sides. 4 nylon bolts and cotter pins (quick release system) 4 plastic end caps for aluminum crossbeams. 4 wood keeper pegs. Option to upgrade to 8 foot or 8 foot spliced cross tubes ...
Catamaran Platform Frame for 2 Inflatable SUP Paddle Boards
Whether you're seeking a relaxing cruise or a sturdy fishing platform, this inflatable platform transforms your paddle boards into the ultimate catamaran experience. 1100 denier, UV and abrasion resistant 9mm PVC Material. 80mm drop stitch, same as air floors in inflatable dinghy boats. Motor mount for trolling motor.


.jpg)


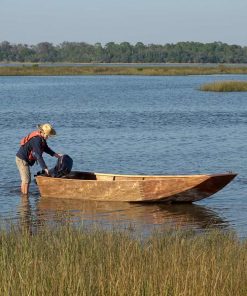

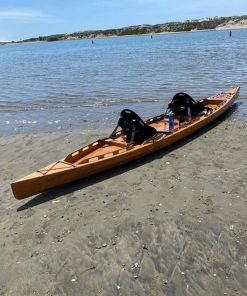


IMAGES
VIDEO
COMMENTS
This Part2/2 features the custom designed SS fixture for the shorter Pelican kayak to address the kayak height differences. The SS pipe catamaran frame is al...
STEP 4. The fairing is now complete, this is done using a filler compound mixed with our West System epoxy resin and applied to the surface of the hull. This process is to ensure that when painted the boat will have a smooth and glossy appearance, and as a general rule the more painstaking the paint-job and fit-out, the higher your resale value.
Product Description. Join two canoes together (they may be different) to create a super stable platform to fish, motor or sail on big waters. System consists of 2 telescoping tubes in sections less than 4 feet each and 8 clamps. System joins the canoes in 2 separate places, with adjustable amount of space between them.
Short Answer. Making a catamaran out of two kayaks is actually relatively simple and can be done in a few steps. First, you'll need to attach the two kayaks together using either rope or straps. Make sure the kayaks are well secured together and evenly balanced.
The Best Advanced Build System in the World. The Schionning Advanced Build System are one of the simplest ways to build your own boat, or have a custom design built faster and more accurately by a professional. Utilising DuFlex panels with a balsa core, large sheets are joined on their long edge to form full length hull panels, bulkheads etc ...
The CLC SailRig is available with three different sails, to suit different boats, conditions, and skill levels: SailRig 40: A 40sq.ft sail is more than enough for fast sailing in solo kayaks and canoes. SailRig 55: The 55sq.ft sail is a good fit for most double kayaks, or for pushing single kayaks a little harder.
Food & Drink. WhiskeyBeerRecipesCocktails & SpiritsHealthy FoodWine. Windbound with a big lake crossing ahead, the crew decide to rig a canoe catamaran.
Rigging: Catamaran Loop Kit. $13.50 USD. Choose Kit. Quantity. Add to cart. This plastic plate, pad eye, fastener and bungee cord combo gives you everything you need to build a pair of attachment points for our kayak/pack canoe catamaran system. On the pack canoes it doubles as an attachment point for the removable backrest in the stern and ...
This page has our canoe sailing product catalog at the very bottom of the page. There's lots to explore. Enjoy! Contact Us: Call 1-888-Joy-Sail or 1- 978-263-7598. Email: [email protected]. Our Sailing Canoe rigs fit virtually every make of canoe. Installs quickly and easily, sails fast and easy.
1) Canoes generally aren't used for catamaran hulls because they can take on waves/water and list/sink/capsize. If you're going to sail this thing in anything with over foot-high waves, you need to make the hulls shed water. Maybe try the FRP solid (sit-on-top) kayaks that have no interior.
Wharram Mana 24 Wood Parts Only Kit view contents. $7444. Additional Components: Wharram Mana 24 Timber Only Kit view contents. $1325. Wharram Mana 24 Platform Material Only view contents. $925. Chesapeake Light Craft has teamed up with James Wharram Designs to offer a kit for the stitch-and-glue Mana 24 catamaran. James Wharram and his partner ...
2 sided outrigger kit for kayak/canoe - 12 or 16 foot. Paddlecats - 12 or 16 foot. Storage and transport options. ... pedal power, and more. Being modular, the Expandacraft will live up to its name. The constant development of new kits will help you expand your enjoyment on the water. Expandacraft quickly breaks down to fit inside a small car ...
The Fusion 40 "Kit Cat" is revolutionising the boatbuilding industry. This vessel has been designed from the beginning as a high performance cruising catamaran that can be stacked into 40 foot containers and freighted anywhere in the world. This photograph shows the infusion moulded components as they would appear when removed from the container.
homemade canoe's connected to make very stable fishing/cruising/swimming platform. Canoe's are 16.5' long and 2' apart at center. Nissan 2.5 hp outboard at r...
Schionning Designs supply a list of the Kit Materials you will receive to start the process., catamaran-build-kit-materials, catamarandesign, compare schionning catamaran designs, ... The internal furniture is now installed, if you chose Kit Option 2, this furniture will be pre-cut to your previously decided upon layout. If you chose to receive ...
4 - 2″ stainless steel U bolts with lock nuts and washers. 4 - 5″ stainless steel eye bolts with lock nuts and washers. 1 - 8′ 2×4 (or a couple of 8″ scraps) 2 - 8″ 5/8×16 bolts with lock nuts and washers. 4 - Ratcheting straps. I also needed a rubber mallet, wrenches, a drill, a set of drill bits, and a table saw.
Plywood components only kits. Plywood components precut plus all timber. Sails. To Order a Boat Or Canoe Kit or Discuss Options. Phone (USA) : 903-894-6293. Email: [email protected]. Facebook Messenger: Facebook Message. Our goal is for you to only make simple cuts that can be done with an inexpensive handsaw.
Kayakamaran. One sail rig for two kayaks makes a catamaran! See Item 6008 for the basic kit. For Deluxe and Super Deluxe packages see item 6010 and item 6011. Customer Feedback. "Hello,I just want to tell you that I had a great weekend of sailing my kayakamaran!" Ellen (June 2014) ==========. "Hi Jim & Betty,
In this case, we will contact you to validate before applying any charge to your CC. Weight. 55 lbs. Dimensions. 97 × 30 × 2 in. Kayak Seat. Basic seat, Premium seat. The Ultimate Boatbuilding Experience: Build this handsome Sit-On-Top from a kit! 14ft Long, Excellent Stability, Dry Cockpit with Scuppers.
MANA's 23'6" hull length has a special significance for James Wharram. In 1956 he made the first successful catamaran voyage across the Atlantic in his first catamaran, the 'Tangaroa', also 23'6" long. In trailer/sailer design every increase in length equals harder launching and recovery work. At 23'6"- 7.15m hull length MANA 24 sits between ...
This 12 foot outrigger kit for 2 sides includes: 2 centers. 4 bow/stern sections. 4 low or high risers. 2 six ft aluminum cross tubes with holes drilled on both sides. 4 nylon bolts and cotter pins (quick release system) 4 plastic end caps for aluminum crossbeams. 4 wood keeper pegs. Option to upgrade to 8 foot or 8 foot spliced cross tubes ...
Whether you're seeking a relaxing cruise or a sturdy fishing platform, this inflatable platform transforms your paddle boards into the ultimate catamaran experience. 1100 denier, UV and abrasion resistant 9mm PVC Material. 80mm drop stitch, same as air floors in inflatable dinghy boats. Motor mount for trolling motor.