Yachting Monthly
- Digital edition


How safe are your guardrails?
- Stef Bottinelli
- March 3, 2016
Check them with these handy tips from the UK’s leading yacht refit experts

Imagine a pitching foredeck at night with nothing to prevent you sliding off the deck. Guardrails and stanchions can save your life, so it’s essential to make sure they are in good condition.
Ian Nicholson’s industry reference, The Boat Data Book , gives good advice: for a yacht up to 12m LOA, use wires of at least 4mm diameter in 316 grade stainless steel, 1×19 construction and a maximum stanchion spacing of 2.2m. Industry standard stanchion height (for boats up to 15m LOA) is 610mm, but some serious cruisers have stanchions of 800 to 900 mm. In addition:
Guardwires should not be PVC-coated. The wires should be visible and need end fittings and tensioning methods at least as strong as the breaking load of the wire. Adjustment arrangements can include simple lashings, turnbuckles or integrated, adjustable forks.
Lashings must be replaced regularly . UV degradation weakens them over time. Turnbuckles and other adjusters should be regularly checked. Guardwires should be tight enough so they do not sag between stanchions, but not so tight to cause wear spots as they pass through the stanchions.
Terminals should be secured fore and aft with clevis pins and split pins , which should be fully opened and either taped over or covered with a bead of silicone sealant to prevent them catching on sheets and sails. Split rings should not be used as they open too easily.
Wires should be regularly checked. If damaged, they must be replaced. Stanchions should be securely fastened to the deck and if bent or damaged, they should be repaired or replaced.

Berthon are safety experts. For more on this important aspect, go to: www.Berthon.co.uk/safety
- BOAT OF THE YEAR
- Newsletters
- Sailboat Reviews
- Boating Safety
- Sails and Rigging
- Maintenance
- Sailing Totem
- Sailor & Galley
- Living Aboard
- Destinations
- Gear & Electronics
- Charter Resources
- Ultimate Boating Giveaway
A Strong Stanchion to Save Your Life
- By John Vigor
- Updated: August 7, 2002
Lifeline stanchions take a terrible beating. Theyre long, thin and almost impossible to install with any pretense of engineering integrity. They might have been designed as levers to pry open a deck. In fact, whenever someone shoves a boat off a dock with a hearty thrust to a stanchion, thats exactly what can happen. In a fiberglass deck, stanchion movement can cause crazing and cracking in the gel coat. In a wood deck, movement will strain the fasteners and loosen the base, disturbing the bedding compound that forms a vital waterproof seal.
In each case, saltwater and rainwater leaks result. Telltale brown stains then will appear inside lockers, above the pilot berth, or on the cabin liner, usually (but not necessarily) directly beneath a stanchion. Leaks can run along stringers and liners, emerging some distance from the source. But leak damage isnt just cosmetic. It can rot interior woodwork or saturate a deck core, leading to delamination, structural degradation and costly repairs.
A leak signals that you need to rebed your stanchion bases. If they were properly fitted in the first place, this is not a big job. You can do one at a time, but its wiser to rebed them all at once. When one springs a leak, chances are the others wont be far behind.
Some stanchions are two-piece affairs with separate bases and upright posts. Some are bolted through the base plate only and others are reinforced with attachments to a bulwark or high toe rail (which makes them substantially stronger). Whatever the make-up, these are the key elements of good stanchion installation:
- Backing pads spread stress loads.
- Flexible bedding compound seals joints against leaks and, in a cored deck, sealed bolt holes keep the core dry.
- Stainless steel bolts/nuts/washers give strength and security.
Keeping these basics in mind, heres a step-by-step guide to rebedding a stanchion base:
Step 1 Remove the wire lifelines. Remove the stanchion from its base (if the two are not integral) by unscrewing the retaining nuts or removing the cotter pins. Lay it aside. Place masking tape flush alongside the edges of the base and tamp down firmly.
Step 2 Remove interior trim or headliner to expose the nuts holding the stanchion base in place. Remove the nuts with a wrench. You may need a helper on deck with a large screwdriver to stop the bolt from turning. Withdraw the bolts and inspect for pitting or crevice corrosion. If need be, replace with new stainless steel bolts of the same size (but at least 1/4-inch in diameter).
Step 3 Lift the stanchion base from the deck, prying gently with a wide screwdriver if necessary. Gently scrape bedding compound off deck and bottom of base. Wash away remaining bedding compound with solvent (paint thinner or mineral spirits if it was an older, linseed oil-based marine putty such as Dolfinite bedding compound; or acetone if it was polysulfide or silicone).
Step 4 Thoroughly sand the deck inside the masking tape with 120-grit paper, taking care not to sand the tape itself, protecting it if necessary with a piece of Formica or similar held in place. Sand the bottom of the base, too.
Step 5 If necessary, prepare a new backing plate. For materials, use at least 3/32-inch-thick stainless steel, 1/8-inch aluminum or 3/16-inch marine plywood. It should be 50 percent longer and wider than the stanchion base, if possible. Place the base on top of the backing plate and mark for holes. Drill holes in the backing plate 1/16-inch larger than the bolt diameter, to allow for bolt drift.
Step 6 For decks cored with balsa or foam, and if the edges of the bolt holes have not been sealed with epoxy to prevent water ingress, there is an additional step to insert here. With a drill, ream out the existing bolt holes through the deck about 3/32-inch larger than the bolt diameter. Tape the bottom of the holes, but prick a small hole through the middle of the tape with dividers or a large needle. Mix a small quantity of epoxy resin with a bonding powder to the consistency of peanut butter and fill the bolt holes, forcing the resin down from the deck until a tiny worm of putty squeezes through the air holes in the tape. Allow the epoxy to cure. Then, using the base plate as a template, carefully re-drill the original-size holes through the middle of the epoxy.
Step 7 Cover the deck area outlined by masking tape with a generous layer of polysulfide sealant such as Boatlife’s Life Calk or 3M 101 marine sealant. Silicone may also be used to bed the base, but polysulfide is the preferred sealant. Polyurethane bedding compound should not be used because it is a powerful adhesive that makes subsequent removal of the base difficult, and will likely cause structural damage to the deck. (Note: Sikaflex claims this effect won’t occur with its less adhesive 231 polyurethane formula and says it’s suitable for bedding deck fittings.)
Step 8 Smear the bottom of the base with a layer of polysulfide sealant. Also smear sealant under the heads of the bolts. Place the base in position and drop the bolts through. Line up the slots in the bolt heads as required, but don’t turn the bolts again or you’ll destroy their waterproof seal. All tightening will be done from inside.
Step 9 Down below, fit the base plate and the washers, and screw on the nuts while a helper holds the bolts in place on deck. Tighten the nuts only until a fat bead of compound oozes out all around the edges of the base. Remove the excess compound with a putty knife or scraper and a rag soaked in mineral spirits, then smooth the sealant against the edges of the base with a finger or a plastic spoon.
Step 10 Allow the sealant to cure according to the manufacturer’s instructions. This could take anywhere from 48 hours to a week. With a helper again on deck to prevent the bolts from turning, tighten the nuts home one by one. Replace the stanchion post in its base and rerig and tension the lifelines.
Stanchions rebedded in this manner will provide many years of good service and add substantially to the security of the deck lifeline system.
Safety-At-Sea Note: The American Boat and Yacht Council suggests that the entire lifeline installation be capable of withstanding a ÒstaticÓ force of about 600 lbs.
In his book Surveying Small Craft, British author Ian Nicolson warns owners to watch out for stanchions secured with screws. All deck fittings should be thru-bolted, he says.
Furthermore, as far as stanchions are concerned, surveyors agree “that there should be underdeck pads to take the nuts and washers, almost regardless of what construction material is used. Mass-produced boats need adequate checking, because there is a tendency to omit these pads or locate them carelessly so that the bolts do not pass through the pads.”
Nicolson advocates using backing pads on top of the deck, between deck and stanchion base, and below the deck.
Dan Spurr, author of Upgrading The Cruising Sailboat, warns that stanchions should be made of stainless steel pipe, not tubing, and should have lock nuts under the deck. “Stanchions should be welded or thru-bolted to their bases, because Allen set screws only dimple the metal, at best, and are not very secure,” he writes.
To keep the exterior of the stanchion base smooth or to prevent damage to a chromed base, you may want to drill only the stanchion. Mark the position of the set screw with the stanchion in place. Remove the stanchion and center punch the spot, then drill and tap it to receive a machine screw. To use the Allen set screw, drill partially through the stanchion to provide a recess into which the set screw can securely sit. Always use LokTite or a similar product on the threads of the bolts, machine screws or set screws to keep them from working loose.
If there are only three holes in a round stanchion base, locate two holes inboard, Spurr advises. The stanchion will better be able to withstand a sudden outward thrust.
———————————————————————— John Vigor is a regular contributor to Cruising World
- More: DIY Sailboat Projects
- More How To

Surviving the Storm: A Sailor’s Tale of Hurricane Lee

Best Practices for Boat-Show Shopping

Grease the Wheels of Your Boat: A Guide to Proper Lubrication

A Bowsprit Reborn: A DIY Renovation Story

Minimalist Cruising: Georgian Bay by Dinghy

Savoring Superior: A Great Lakes Cruise To Remember

Point Your Compass Due South, Bitter End Yacht Club Reopens October 23rd.
- Digital Edition
- Customer Service
- Privacy Policy
- Terms of Use
- Email Newsletters
- Cruising World
- Sailing World
- Salt Water Sportsman
- Sport Fishing
- Wakeboarding
Replacing Your Lifelines
Published by rigworks on april 8, 2016.
Question: What are my options for replacing worn lifelines?
From the Rigger: There are more choices than ever when replacing worn lifelines…
Most lifelines are made of wire, usually uncoated 1×19 grade 316 stainless steel which is well suited for stationary applications such as lifelines. Diameters vary depending on the size of the boat. We generally use 1/8 ” wire for boats under 30’ and 3/16” for boats 30’ and longer, although there are exceptions (J-105s for example prefer 5/32”). Of course, you can go heavier, but the extra weight can be prohibitive.
Boat owners are moving away from the vinyl covered 3/16” wire that has been the industry standard for years. In fact, the 2016 Safety Equipment Requirements no longer allow coated wire on coastal and ocean racing sailboats (there is a list of the 2016 racing SERs associated with lifelines at the end of this article). But if you don’t plan to race, you may still prefer the feel and appearance of coated wire. Vinyl coated wire’s primary advantage is that it is attractive and comfortable to handle. It can, however, discolor and crack over time, is susceptible to heat, and makes it difficult to inspect the wire underneath.
Synthetic lifelines made of low stretch Dyneema are becoming a popular alternative to wire. Dyneema, made of High Modulus Polyethylene (HMPE), is stronger and much lighter than steel. It is easy to install, can be spliced, doesn’t rust, and is easy to handle. Although it is more susceptible to chafing, chafe points can be protected with extra layers and/or tape. When converting from wire to Dyneema, be especially conscious of existing burrs on your stanchions, a common cause of chafing. We recently installed Dyneema lifelines on a 38’ catamaran, and the customer was very happy with the results.
Regardless of whether you choose wire, coated wire, or Dyneema, we recommend that you always purchase high quality 316 grade fittings, including your turnbuckles, pelican hooks, gate eyes, toggle jaws, deck toggles, etc. We recommend Hayn, Johnson or Arco fittings which operate smoothly and withstand high loads. We also suggest taping or pinning your fittings whenever possible. Sailors end up in the water as a result of fitting failures. Don’t scrimp here!
Your connections can be hand crimped, machine swaged, or spliced (in the case of Dyneema lines). Hand crimping is the least expensive “do-it-yourself” option but not our first choice. Hand crimping often leaves a bulky joint and can be susceptible to pulling free under load. We often see poorly/under-crimped connections which are definitely not safe. A proper swage is the strongest option. Unlike hand-crimped connections that may simply break free, a tired swage connection will generally reveal hairline cracks prior to failing, giving you time to replace them. As for splicing those Dyneema lines, we do that here at Rigworks!
Finally, stanchions are often the weak link in your lifeline system. Tall and narrow, they are susceptible to bending, especially when used to catch the boat as you dock or to tie off sheets and halyards. Delamination and cracking at the base are also quite common. Use grade 316 stainless steel 1” diameter stanchions to reduce the likelihood of bending. Always check welds on bales and bases for rust which can be a telltale sign of cracking. Be sure that each stanchion is properly braced and bolted into a reinforced area of your deck and/or into a backing plate.
Of course, this is only the tip of the iceberg. Stanchion height and placement, line spacing (both horizontally and vertically), tension, deflection, toerails, etc. all need to be carefully considered. For professional installation or to discuss your own lifelines, email us at [email protected] or call us at 619-223-3788. We always look forward to hearing from you!
If you race, please read on…
Here is a list of the 2016 Safety Equipment Requirements that apply to lifelines for both coastal and ocean racing. For full list of 2016 SERs, visit the US Sailing website at http://www.ussailing.org/safety/equipment-and-requirements/
- A boat’s stanchion and pulpit bases shall be within the working deck. Stanchions used with High Modulus Polyethylene (HMPE) shall have rounded openings to reduce chafe.
- Bow pulpits may be open, but the opening between the vertical portion of stanchion pulpit and any part of the boat shall not exceed 14.2″ (360mm).
- Lifelines may be either uncoated stainless steel wire or HMPE line with spliced terminations or terminals specifically intended for the purpose. A multipart-lashing segment not to exceed 4″ per end termination for the purpose of attaching lifelines to pulpits is allowed. Lifelines shall be taut (see below). When HMPE is used, the load-bearing portion (core) shall meet or exceed minimum diameter requirements.
- When a deflecting force of 9 lbs (40N) is applied to a lifeline midway between supports of an upper or single lifeline, the lifeline shall not deflect more than 2” (50mm). This measurement shall be taken at the widest span between supports that are aft of the mast.
- When a deflecting force of 9 lbs (40N) is applied midway between supports of an intermediate lifeline of all spans that are aft of the mast, deflection shall not exceed 5” (120mm) from a straight line between the stanchions.
- The maximum spacing between lifeline supports (e.g. stanchions and pulpits) shall be 87″ (2.2m).
- Boats under 30′ (9.14m) shall have at least one lifeline with 18″ (457mm) minimum height above deck, and a maximum vertical gap of 18″ (457mm). Taller heights will require a second lifeline. The minimum diameter shall be 1/8″ (3mm).
- Boats 30′ and over (9.14m) shall have at least two lifelines with 24″ (762mm) minimum height above deck, and a maximum vertical gap of 15″ (381mm). The minimum diameter will be 5/32″ (4mm) for boats to 43′ (13.1m) and 3/16″ (5mm) for boats over 43′ (13.1m).
- Toe rails shall be fitted around the foredeck from the base of the mast with a minimum height of 3/4″ (18mm) for boats under 30′ (9.14m) and 1″ (25mm) for boats over 30′. An additional installed lifeline that is 1-2″ (25-51mm) above the deck will satisfy this requirement for boats without toerails.
- Trimarans are exempted from the lifeline requirement where there is a trampoline outboard of the main hull, except that a lifeline must run from the top of a bow pulpit to the forward crossbeam at the outboard edge of the bow net or foredeck. Catamarans with trampoline nets between the hulls are exempted from the lifeline requirement. All catamarans are exempted from the need for pulpits and lifelines across the bow.
Related Posts
Ask the Rigger
Do your masthead sheaves need replacing.
Question: My halyard is binding. What’s up? From the Rigger: Most boat owners do not climb their masts regularly, but our riggers spend a lot of time up there. And they often find badly damaged Read more…
Standing Rigging (or ‘Name That Stay’)
Question: When your riggers talk about standing rigging, they often use terms I don’t recognize. Can you break it down for me? From the Rigger: Let’s play ‘Name that Stay’… Forestay (1 or HS) – Read more…
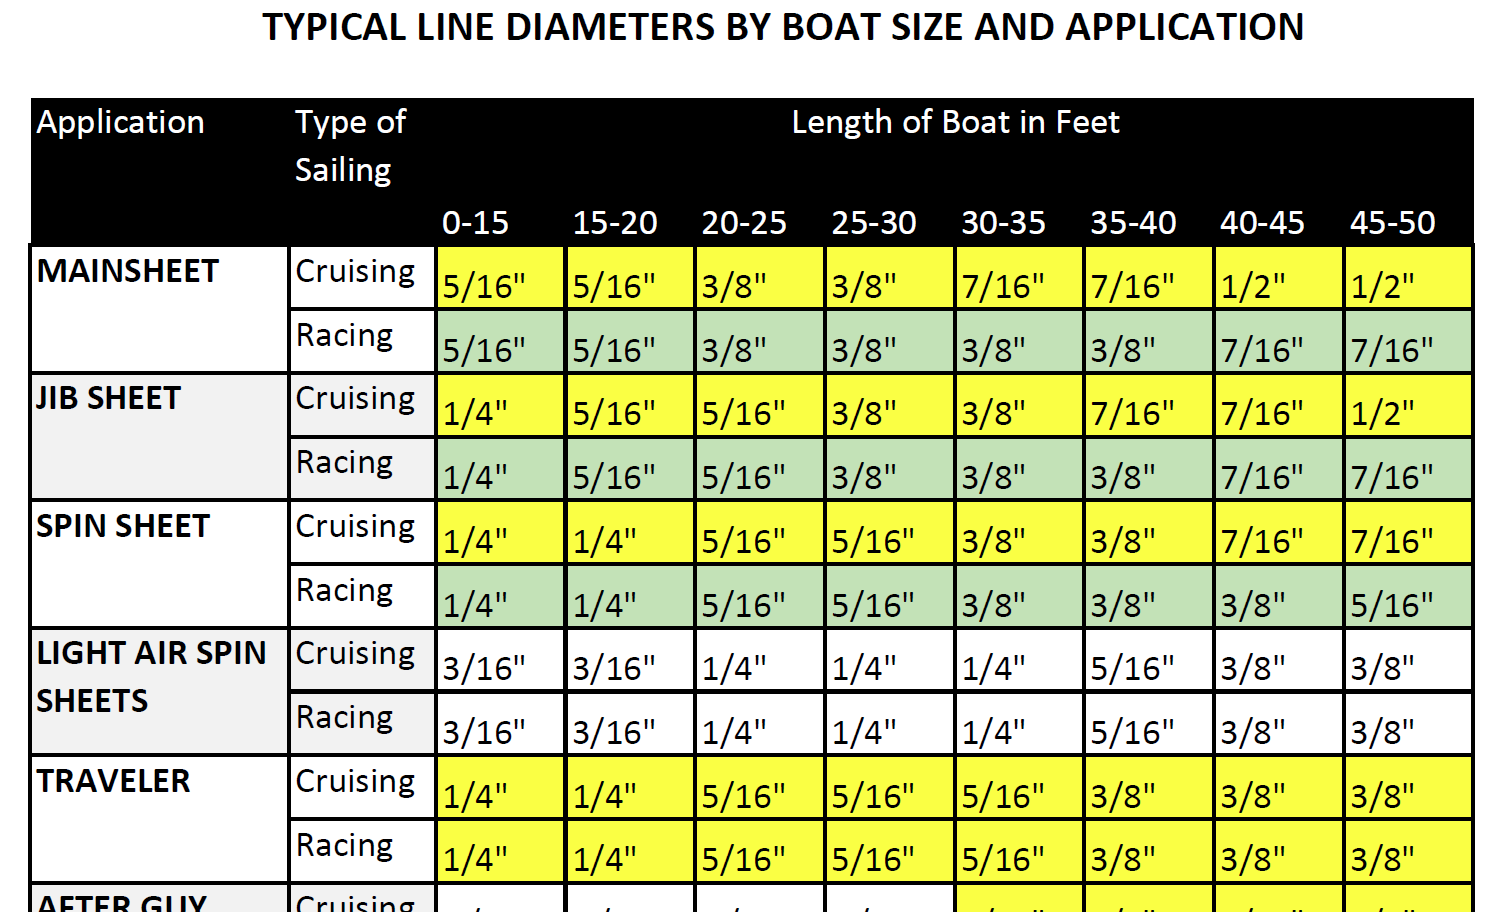
Selecting Rope – Length, Diameter, Type
Question: Do you have guidelines for selecting halyards, sheets, etc. for my sailboat? From the Rigger: First, if your old rope served its purpose but needs replacing, we recommend duplicating it as closely as possible Read more…
Currency: GBP
- Worldwide Delivery
Mooring Warps and Mooring Lines
- LIROS 3 Strand Polyester Mooring Warps
- LIROS Green Wave 3 Strand Mooring Warps
- LIROS Braided Dockline Mooring Warps
- LIROS Handy Elastic Mooring Warps
- Marlow Blue Ocean Dockline
- LIROS Super Yacht Mooring Polyester Docklines
- 50 metre / 100 metre Rates - Mooring
Mooring Accessories
- Mooring Compensators
Mooring Strops and Bridles
- V shape Mooring Bridles
- Y shape Mooring Bridles
- Small Boat and RIB Mooring Strops
- Mooring Strops
- Mooring Strops with Chain Centre Section
Mooring Assistance
- Coastline Bow Thruster Accessories
- Max Power Bow Thrusters
- Bonomi Mooring Cleats
- Majoni Fenders
- Polyform Norway Fenders
- Ocean Inflatable Fenders
- Dock Fenders
- Fender Ropes and Accessories
Mooring Components
- Mooring Swivels
- Mooring Shackles
- Mooring Cleats and Fairleads
- Mooring Buoys
Mooring Information
- Mooring Warps Size Guide
- Mooring Lines - LIROS Recommended Diameters
- Mooring Rope Selection Guide
- Mooring Warp Length and Configuration Guide
- How to estimate the length of a single line Mooring Strop
- Mooring Ropes - Break Load Chart
- Mooring Compensator Advisory
- Rope Cockling Information
- Fender Size Guide
- Majoni Fender Guide
- Polyform Norway Fender Inflation Guide
- More Article and Guides >
Anchor Warps Spliced to Chain
- LIROS 3 Strand Nylon Spliced to Chain
- LIROS Anchorplait Nylon Spliced to Chain
Anchor Warps
- LIROS Anchorplait Nylon Anchor Warps
- LIROS 3 Strand Nylon Anchor Warps
- Leaded Anchor Warp
- Drogue Warps and Bridles
- 50 / 100 metre Rates - Anchoring
- Aluminium Anchors
- Galvanised Anchors
- Stainless Steel Anchors
Calibrated Anchor Chain
- Cromox G6 Stainless Steel Chain
- G4 Calibrated Stainless Steel Anchor Chain
- Lofrans Grade 40
- MF DAMS Grade 70
- MF Grade 40
- Titan Grade 43
- Lewmar Windlasses
- Lofrans Windlasses
- Maxwell Windlasses
- Quick Windlasses
- Windlass Accessories and Spares
Chain Snubbers
- Chain Hooks, Grabs and Grippers
- Chain Snubbing Bridles
- Chain Snubbing Strops
Anchoring Accessories
- Anchor Connectors
- Anchor Trip Hooks and Rings
- Anchoring Shackles
- Bow Rollers and Fittings
- Chain and Anchor Stoppers
- Chain Links and Markers
Anchoring Information
- How To Choose A Main Anchor
- Anchoring System Assessment
- Anchor Chain and Rope Size Guide
- The Jimmy Green Guide to the Best Anchor Ropes
- What Size Anchor Do I Need?
- Anchor to Chain Connection Guide
- How to Choose Your Anchor Chain
- How to Establish the Correct Anchor Chain Calibration?
- Calibrated Anchor Chain - General Information
- Calibrated Anchor Chain Quality Control
- Calibrated Chain - Break Load and Weight Guide
- Galvanising - Managing Performance and Endurance expectation
- Can Galvanised Steel be used with Stainless Steel?
- Windlass Selection Guide
- More Articles and Guides
Stainless Steel Wire Rigging and Wire Rope
- 1x19 Wire Rigging
- 50 / 100 metre Rates - Wire and Fibre
- 7x19 Flexible Wire Rigging
- Compacted Strand Wire Rigging
Dinghy Rigging
- Stainless Steel Dinghy Rigging
- Dinghy Rigging Fittings
Fibre Rigging
- LIROS D-Pro Static Rigging
- LIROS D-Pro-XTR Fibre Rigging
- DynIce Dux Fibre Rigging
- Fibre Rigging Fittings
Wire Terminals
- Cones, Formers, Wedges, Ferrules, Rigging Spares
- Hi-Mod Swageless Terminals
- Sta-Lok Swageless Terminals
- Swage Terminals
Wire Rigging Fittings
- Turnbuckle Components
Rigging Accessories
- Rigging Chafe Protection
- Headsail Reefing Furlers
- Plastimo Jib Reefing
- Selden Furlex Reefing Gear
Furling Systems
- Anti-torsion Stays
- Straight Luff Furlers
- Top Down Furlers
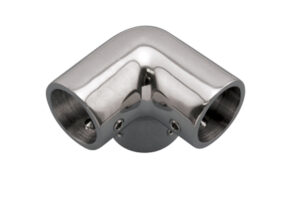
Guard Wires, Rails and Fittings
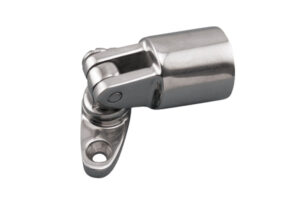
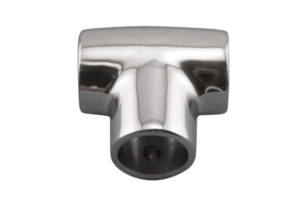
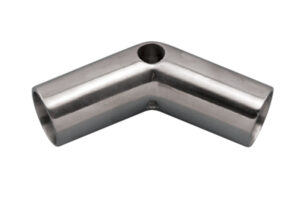
- Guard Rail Fittings
- Guard Rails in Fibre and Webbing
- Guard Wire Accessories
- Guard Wires
Standing Rigging Assistance
- Replacing your Furling Line
- Fibre Rigging Break Load Comparison Guide
- More Articles and Guides >
- Cruising Halyards
- Performance Halyards
- Dinghy Halyards
Rigging Shackles
- Captive and Key Pin Shackles
- hamma™ Snap Shackles
- Soft Shackles
- Standard Snap Shackles
- Wichard Snap Shackles
Classic Ropes
- Classic Control Lines
- Classic Halyards
- Classic Sheets
- Cruising Sheets
- Performance Sheets
- Dinghy Sheets
Sail Handling
- Boom Brakes and Preventers
- Lazy Jack Sail Handling
- Rodkickers, Boomstruts
- Sail Handling Accessories
50 / 100 metre Rates - Running Rigging
- 50 / 100 metres - Cruising Ropes
- 50 / 100 metres - Dinghy Ropes
- 50 / 100 metres - Performance Ropes
Control Lines
- Cruising Control Lines
- Performance Control Lines
- Dinghy Control Lines
- Continuous Control Lines
Running Rigging Accessories
- Anti-Chafe Rope Protection
- Lashing, Lacing and Lanyards
- Mast and Boom Fittings
- Rope Stowage
- Sail Ties and Sail Stowage
- Shock Cord and Fittings
- LIROS Ropes
- Marlow Ropes
Running Rigging Resources
- Running Rigging Rope Fibres and Construction Explained
- How to Select a Suitable Halyard Rope
- How to select Sheets and Guys
- Dyneema Rope - Cruising and Racing Comparison
- Dinghy Rope Selection Guide
- Rope Measurement Information
- Running Rigging - LIROS Recommended Line Diameters
- Running Rigging Break Load Comparison Chart
- Colour Coding for Running Rigging
- Selecting the right type of block, plain, roller or ball bearing
- Recycling Rope
- Running Rigging Glossary
Plain Bearing Blocks
- Barton Blocks
- Harken Element Blocks
- Low Friction Rings
- Selden Yacht Blocks
- Wichard MXEvo Blocks
- Wooden Yacht Blocks
Control Systems
- Ratchet Blocks
- Stanchion Blocks and Fairleads
- Snatch Blocks
- Genoa Car Systems
- Traveller Systems
- Block and Tackle Purchase Systems
Ball Bearing Blocks
- Harken Ball Bearing Blocks
- Selden Ball Bearing Blocks
Roller Bearing Blocks
- Harken Black Magic Blocks
- Selden Roller Bearing Blocks
Deck Fittings
- Bungs and Hatches
- Bushes and Fairleads
- Deck Eyes, Straps and Hooks
- Pad Eyes, U Bolts and Eye Bolts
- Pintles and Gudgeons
- Tiller Extensions and Joints
- Harken Winches, Handles and Accessories
- Barton Winches, Snubbers and Winchers
- Lewmar Winches, Handles and Accessories
- Winch Servicing and Accessories
Clutches and Organisers
- Barton Clutches and Organisers
- Spinlock Clutches and Organisers
- Lewmar Clutches
- Harken Ball Bearing Cam Cleats
- Barton K Cam Cleats
Deck Hardware Support
- Blocks and Pulleys Selection Guide
- Barton High Load Eyes
- Dyneema Low Friction Rings Comparison
- Seldén Block Selection Guide
- Barton Track Selection Guide
- Barton Traveller Systems Selection Guide
- Harken Winch Selection Guide
- Karver Winch Comparison Chart
- Lewmar Winch Selection Guide - PDF
- Winch Servicing Guide
Sailing Flags
- Courtesy Flags
- Red Ensigns
- Blue Ensigns
- Signal Code Flags
- Flag Staffs and Sockets
- Flag Accessories
- Flag Making and Repair
- Webbing only
- Webbing Soft Shackles
- Webbing Restraint Straps
- Webbing Sail Ties
- Sail Sewing
- PROtect Tape
Fixings and Fastenings
- Screws, Bolts, Nuts and Washers
- Monel Rivets
Hatches and Portlights
- Lewmar Hatches
- Lewmar Portlights
- Fids and Tools
- Knives and Scissors
General Chandlery
- Carabiners and Hooks
- Antifouling
Flag Articles
- Flag Size Guide
- Bending and Hoisting Methods for Sailing Flags
- Courtesy Flags Identification, Labelling and Stowage
- Courtesy Flag Map
- Flag Etiquette and Information
- Glossary of Flag Terms and Parts of a Flag
- Making and Repairing Flags
- Signal Code Message Definitions
Other Chandlery Articles
- Anchorplait Splicing Instructions
- Antifoul Coverage Information
- Hawk Wind Indicator Selection Guide
- Petersen Stainless - Upset Forging Information
- Speedy Stitcher Sewing Instructions
- Thimble Dimensions and Compatible Shackles
Jackstays and Jacklines
- Webbing Jackstays
- Stainless Steel Wire Jackstay Lifelines
- Fibre Jackstay Lifelines
- Jackstay and Lifeline Accessories
Lifejackets
- Crewsaver Lifejackets
- Seago Lifejackets
- Spinlock Lifejackets
- Children's Life Jackets
- Buoyancy Aids
Floating Rope
- LIROS Multifilament Polypropylene
- LIROS Yellow Floating Safety Rope
Guard Wires, Guardrails and Guardrail Webbing
Lifejacket accessories.
- Lifejacket Lights
- Lifejacket Rearming Kits
- Lifejacket Spray Hoods
- Safety Lines
Seago Liferafts
- Grab Bag Contents
- Grab Bags and Polybottles
- Liferaft Accessories
- Danbuoy Accessories
- Jimmy Green Danbuoys
- Jonbuoy Danbuoys
- Seago Danbuoys
Overboard Recovery
- Lifebuoy Accessories
- Purchase Systems
- Slings and Throwlines
Safety Accessories
- Fire Safety
- Sea Anchors and Drogues
Safety Resources
Guard wires - inspection and replacement guidance.
- Guard Wire Stud Terminal Dimensions
- Webbing Jackstays Guidance
- Webbing Jackstays - Custom Build Instructions
- Danbuoy Selection Guide
- Danbuoy Instructions - 3 piece Telescopic - Offshore
- Liferaft Selection Guide
- Liferaft Servicing
- Man Overboard Equipment - World Sailing Compliance
- Marine Safety Information Links
- Safety Marine Equipment List for UK Pleasure Vessels
Sailing Clothing
- Sailing Jackets
- Sailing Trousers
- Thermal Layers
Leisure Wear
- Accessories
- Rain Jackets
- Sweatshirts
Sailing Footwear
- Dinghy Boots and Shoes
- Sailing Wellies
Leisure Footwear
- Walking Shoes
Sailing Accessories
- Sailing Bags and Holdalls
- Sailing Gloves
- Sailing Kneepads
Clothing Clearance
Clothing guide.
- What to wear Sailing
- Helly Hansen Mens Jacket and Pant Size Guide
- Helly Hansen Womens Sailing Jacket and Pant Size Guide
- Lazy Jacks Mens and Womens Size Charts
- Musto Men's and Women's Size Charts
- Old Guys Rule Size Guide
- Sailing Gloves Size Guides
- Weird Fish Clothing Size Charts
The Jimmy Green Clothing Store
Lower Fore St, Beer, East Devon, EX12 3EG
- Adria Bandiere
- Anchor Marine
- Anchor Right
- August Race
- Barton Marine
- Blue Performance
- Brierley Lifting
- Brook International
- Brookes & Adams
- Captain Currey
- Chaineries Limousines
- Coastline Technology
- Colligo Marine
- Cyclops Marine
- Douglas Marine
- Ecoworks Marine
- Exposure OLAS
- Fire Safety Stick
- Fortress Marine Anchors
- Hawk Marine Products
- Helly Hansen
- International
- Jimmy Green Marine
- Maillon Rapide
- Mantus Marine
- Marling Leek
- Meridian Zero
- MF Catenificio
- Ocean Fenders
- Ocean Safety
- Old Guys Rule
- Petersen Stainless
- Polyform Norway
- PSP Marine Tape
- Sidermarine
- Stewart Manufacturing Inc
- Team McLube
- Technical Marine Supplies
- Titan Marine (CMP)
- Ultramarine
- Waterline Design
- William Hackett
Clearance LIROS Racer Dyneema £55.08
Clearance Folding Stock Anchor £123.25
Clearance Sarca Excel Anchors £294.00
Clearance LIROS Herkules £0.00
Clearance Barton Size 0 Ball Bearing Blocks - 5mm £0.00
Clearance Marlow Blue Ocean® Doublebraid £18.48
Mooring Clearance
Anchoring clearance, standing rigging clearance, running rigging clearance, deck hardware clearance, chandlery clearance, safety clearance, replacing your guard wires, a step-by-step guide.
Guard Wires, also known as Guard Rails and Lifelines, are fitted through Deck Stanchions positioned along the toe rail or gunwale between the pulpit and pushpit rails on yachts and boats to help prevent crew members from falling overboard.
As part of a yacht’s safety inventory, they should be regularly and meticulously checked for any visible signs of possible failure and replaced without hesitation if the need arises.
Insurance companies are becoming increasingly concerned with the age and condition of standing rigging on yachts, but so far, they don’t seem to be pushing too hard for evidence regarding the provenance and condition of guard wires.
However, if you recently made a second-hand purchase, it is advisable to check the Guard Wires and the Standing Rigging thoroughly.
Essentially, it is all wire rigging and subject to the same conditional age restraints.
Tackling the task of specifying, measuring, and fitting new Guard Wires on a sailing yacht may seem difficult, but there is a procedure to follow that can make it relatively straightforward for anyone who is reasonably practical.
The Jimmy Green Rigging Team is on hand to advise with any tricky bits.
You can purchase each wire with swaged terminals at both ends, finished and ready to fit, subject to the holes in your stanchions being a minimum 8mm clearance internal diameter. You can order yourself online or with help from the Jimmy Green Rigging Team.
You can take confidence from the fact there is a good deal of adjustment on rigging screws and guardrail adjusters to allow for any minor measurement errors, and there is even more latitude if you are terminating the wires with a lashing.
The Jimmy Green Rigging Team set the turnbuckles at 2/3 open unless otherwise requested, aiming to produce the finished wires with an accuracy to within plus or minus the diameter of the wire.
If the holes in your stanchions only allow the wire to pass through, not the swaged terminal options, you need a slightly different approach.
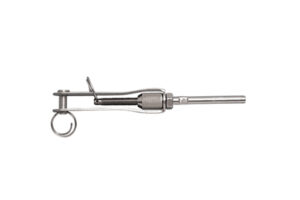
This will generally involve purchasing each wire over long with one terminal end swaged. The other end will need to be finished in situ by cutting to the exact length and fitting a DIY (mechanical) terminal. Modern swageless terminals from Sta-Lok or Petersen are simple to fit, so you can be confident of success.
Guard Wire Checklist
- Carry out an overall assessment of the state of the current installation
- Consider whether repeating the same lengths as the existing wires will produce the desired result.
- Consider any design or specification alterations
- Identify all existing components, including measuring the wire diameter.
- Take photos.
- Make a note of any tension settings.
- Determine any possible improvements
1. Guard Wire Installation Assessment
Begin by checking that your current lifelines are set up and tensioned correctly. This need not be as technical as it sounds - you need to ensure you copy a system that works well.
Assess the current state of the whole system, including
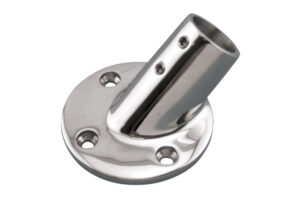
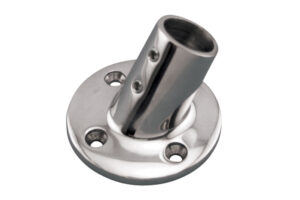
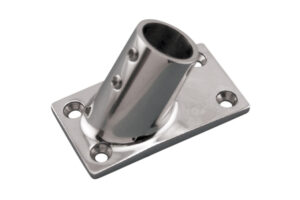
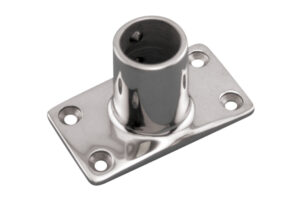
- Stanchions and their bases
- Pushpit and pulpit
- All the deck fixings
- The overall alignment of the fixing lugs and through holes.
- The possibility that the whole system is leaning inboard due to excessive tension over a long period
Stanchions should normally be a minimum of 610mm high and are often as high as 900mm, with a maximum spacing of approximately 2 metres.
Normally, two wires are fitted: an upper guard wire at full height (minimum 600mm) and a lower guard wire at an intermediate level.
The span between stanchions, gateway stanchions, the pulpit and the pushpit should be as short as practicable to minimise the damaging effect of an impact in the middle.
Gates are commonly fitted amidships to port and starboard on larger yachts. Gates require a pair of braced stanchions or short stabilising rails with a tensioning system at both the pulpit and pushpit. If no gate is fitted, the wires should run continuously fore and aft, with the tensioning system on the aft end, where they attach to the pushpit.
Guardrail Webbing, sewn to custom measurements are a useful replacement for wire when a little more comfort is required, e.g. where the crew may be leaning against it
Fender lanyards are commonly tied off on the guard wires. This practice is not ideal but is often the only practicable solution. To minimise their pulling effect, it is advisable to locate the fender lanyards as close as possible to a stanchion.
Guardrail Netting can be fitted to improve overall security and prevent the egress of smaller objects or bodies.
Safety Checks for PVC Coated or Plain wire should follow a similar pattern with particular attention to damage or deterioration caused by corrosion or deformation of the wire construction, e.g. bending that results in a permanent kink.
Rust or corrosion will normally occur:
- On the section of wire that immediately protrudes from the PVC coating.
- On the wire immediately adjacent to the wire terminal, whether swaged or swageless
- To a lesser extent, between the two above
- On any wire section where the PVC coating has been compromised, allowing water ingress.

Plain or bare wire is more easily inspected for signs of damage or imminent failure.

Inspection should also include close visual scrutiny of all the other aspects of the guardrail installation, e.g.
Stanchions and Gate Stanchions – are they bent or damaged? Are the eyes causing an ongoing issue with chafe? Are they securely fixed into the stanchion bases? Are the feet on the brace firmly screwed down to the deck?
Stanchion Bases – are they in good condition and with a strong and stable fastening to the deck or toe rail?
Pushpit and Pulpit Rails – Is the welding on the attachment lugs intact and serviceable? Are the deck fixings strong enough?
Lashings – are they made off satisfactorily? Are there enough turns to make up the requisite break load? Has the rope suffered from UV deterioration or abrasion?
2. Consider any design or specification alterations
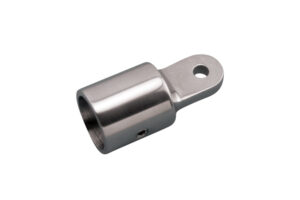
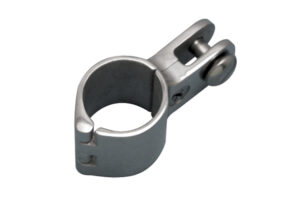
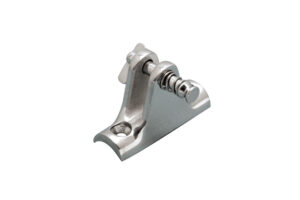
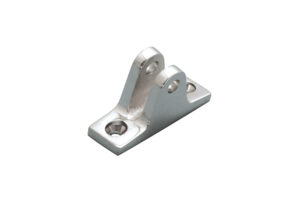
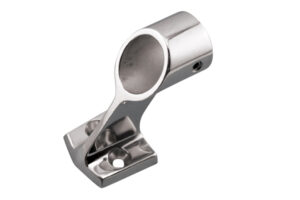
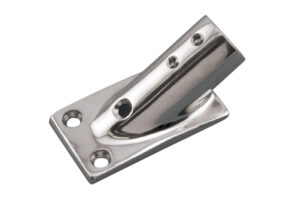
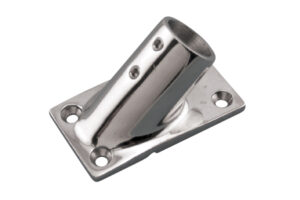
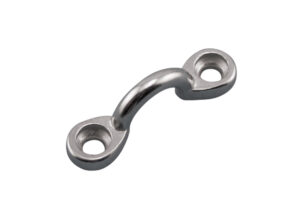
Exclude any extra unnecessary shackles or fittings and make allowance in your measurements. A fork terminal is generally the optimum fitting for connecting to the lug on the forward pulpit rail. The picture shows a guardrail adjuster with a fork end. A fixed fork terminal can be used if no adjustment is required, e.g. at the forward end.

Research your tensioning options for the aft end: Bottle Screw/Rigging Screw/Guardrail adjuster/Adjustable Fork/lanyard Eye.
How to Decide between PVC Covered or Plain uncovered Wire for Lifelines and Rigging.
4mm and 5mm diameter 1x19 stainless steel wire are available with a PVC coating.
4mm wire increases to 6mm overall diameter and 5mm wire to 8mm overall.
The PVC coating forms a protective sheath with an aesthetically pleasing white finish and a more forgiving composition than bare stainless steel.
The composition and surface of the PVC sleeving are kinder to hands and other exposed parts of the body and less abrasive on sails and rigging.
The PVC may hide deterioration in the wire and make it more difficult to detect or predict, but there are checks that can be carried out to reduce the chances of failure.
3. Close inspection of all components
Guard wires should be made from Marine Grade 316 stainless steel 1x19 wire, with a minimum 4mm diameter for leisure yachts and boats up to approximately 12 metres in length overall - KOS Manufacturer Break Load 1280kg.
5mm stainless steel 1x19 wire is preferable as it is appreciably more substantial and considerably stronger - KOS MBL 2000kg.
6mm should be considered on larger yachts over 15 metres in length overall – KOS MBL 2880kg.
The wire pictured below is a flexible 7x7 or 7x19 construction, which is not advisable for guard wires.
1x19 construction wire is much stronger and has a smooth finish.

The wire terminals and end fittings, including any rigging screws, turnbuckles, guardrail adjusters and adjustable forks, need to be at least as strong as the wire. This also applies to any lashings or lanyards used to finish and tension the wires.
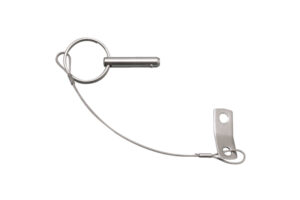
Clevis pins, clevis rings and split pins should be secured and wrapped with Insulation Tape to prevent accidental snagging on sheets and sails.
Establish the size of every component and make notes. A good quality pair of callipers is an invaluable investment for producing accurate results.
Once you have confirmed the wire diameter and approximate length and identified the terminals fore and aft, it is a simple online exercise to get an accurate estimate of the replacement cost on Guard Wires Lifelines and Guardrail Webbing. Alternatively, the Jimmy Green Rigging Team will happily oblige based on the same information.
4. Take photos
Take photos of everything, including zoomed-in details of anything you are unsure about and any others that will serve as a reminder when fitting the new wires.
Standard pin and hole diameters correspond with the thread size of the studs in the turnbuckles. Threads are generally UNF or possibly the Metric equivalent. The Jimmy Green Rigging Team can suggest suitable alternatives or source bespoke replacements if your current guard wire fittings are no longer available.
5. Mark all tension settings
Make a note of any tension settings by marking them with tape or taking photos. If you loosen any turnbuckles to disconnect them, remember to return them to their noted settings before measuring. The new wires can then be made to the required length with the optimum adjustment, normally 2/3 open.
6. Determine any possible improvements
One last check to ensure that there isn’t a change of fitting or a tweak in the set-up that will make the new system an improvement on the old one.
Gateway Illustrations

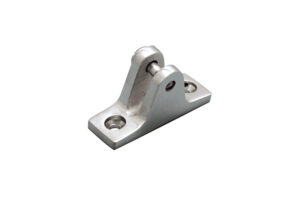
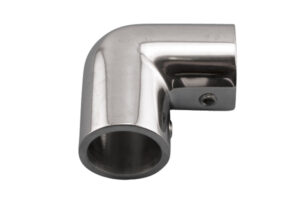
1. Gate stanchions with bracing struts

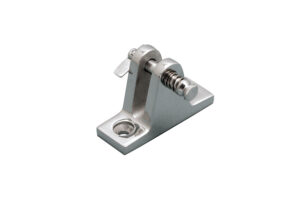
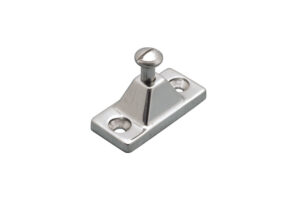
2. Lanyard threaded stud passed through the stanchion hole with Lanyard Eye screwed on - Pelican hooks provide adjustment and convenient release and attachment.

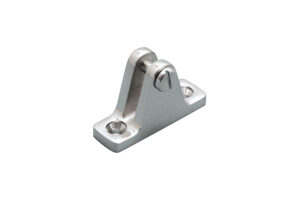
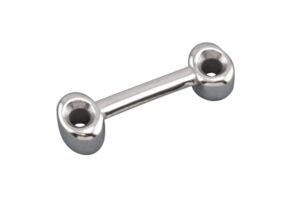
3. Large stanchion holes provide all sorts of options for connecting the other side of the gate - in this example, a fixed fork interlocks with a fixed eye terminal.
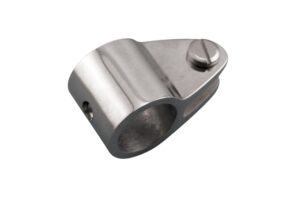
Staining or Discolouring on Stainless Steel
This guardrail adjuster is not compromised but merely needs the application of Stainless Steel Cleaner to restore it to a bright, polished finish.

- New Sailboats
- Sailboats 21-30ft
- Sailboats 31-35ft
- Sailboats 36-40ft
- Sailboats Over 40ft
- Sailboats Under 21feet
- used_sailboats
- Apps and Computer Programs
- Communications
- Fishfinders
- Handheld Electronics
- Plotters MFDS Rradar
- Wind, Speed & Depth Instruments
- Anchoring Mooring
- Running Rigging
- Sails Canvas
- Standing Rigging
- Diesel Engines
- Off Grid Energy
- Cleaning Waxing
- DIY Projects
- Repair, Tools & Materials
- Spare Parts
- Tools & Gadgets
- Cabin Comfort
- Ventilation
- Footwear Apparel
- Foul Weather Gear
- Mailport & PS Advisor
- Inside Practical Sailor Blog
- Activate My Web Access
- Reset Password
- Customer Service

- Free Newsletter
Blue Jacket 40 Used Boat Review

Catalina 270 vs. The Beneteau First 265 Used Boat Match-Up

Ericson 41 Used Boat Review

Mason 33 Used Boat Review

How to Create a Bullet-Proof VHF/SSB Backup

Tips From A First “Sail” on the ICW

Tillerpilot Tips and Safety Cautions

Best Crimpers and Strippers for Fixing Marine Electrical Connectors

Polyester vs. Nylon Rode

Getting the Most Out of Older Sails

How (Not) to Tie Your Boat to a Dock

Stopping Mainsheet Twist
Fuel Lift Pump: Easy DIY Diesel Fuel System Diagnostic and Repair

Ensuring Safe Shorepower

Sinking? Check Your Stuffing Box

What Do You Do With Old Fiberglass Boats?

Boat Repairs for the Technically Illiterate

Boat Maintenance for the Technically Illiterate

Whats the Best Way to Restore Clear Plastic Windows?

Stopping Holding-tank Odors

Giving Bugs the Big Goodbye

Galley Gadgets for the Cruising Sailor

The Rain Catcher’s Guide

Sailing Gear for Kids

What’s the Best Sunscreen?

UV Clothing: Is It Worth the Hype?

Preparing Yourself for Solo Sailing

R. Tucker Thompson Tall Ship Youth Voyage

On Watch: This 60-Year-Old Hinckley Pilot 35 is Also a Working…

On Watch: America’s Cup

On Watch: All Eyes on Europe Sail Racing

Dear Readers
- Safety & Seamanship
- Sails, Rigging & Deck Gear
Lifeline Stanchions: New Aluminum Matella Is Super Strong
Cast bases outperform welded ones, so look to spartan and suncor..

Long ago, aboard sailing ships trapped in the doldrums, the crew rigged long, vertical poles to support awnings. The awnings were needed to keep the decks from opening up and to prevent living things—man and beast—from dying in the heat.

The poles became pipes, they got shorter and soon they were called “bulwark stanchions.”
And that’s how, as bulwarks extending above the weather deck shrank, lifelines came into being. Bulwarks, once needed to keep deck-loaded cargo from going over the side, added to the cost of construction; they also added a lot of windage and could scoop up tons of water.
Stanchions, threaded with strong, low-windage rope or wire lifelines, became slim and trim.
On modern ships and yachts, the lifelines the stanchions support are intended to keep the crew from going overboard. To be really effective, the lifelines should be taller than generally seen. Waist high should be the minimum. How the boat looks shouldn’t be an issue, but it is.
The lifelines and the supporting stanchions and bases must be strong enough to withstand a lurching fall by a large crew member.
Standards for stanchions and lifelines are meager. The Offshore Racing Council says the lifelines should be 18″ high on boats no more than 28′ LOA, 24″ on larger boats with both mounted on through-bolted, bonded or welded stanchions no more than 7′ apart. The Cruising Club of America’s Fastnet-inspired publication, Desirable and Undesirable Characteristics of Offshore Yachts, states only that stanchions be of stainless steel and through-bolted. A recent study sponsored by the United States Naval Academy and the United States Sailing Association suggested that plastic-coated lifeline wire should be replaced with bare wire and that, because pulpits and pushpits are weak attachment points for lifelines, their bases should be equipped with supporting struts.
For this Practical Sailor test, almost two dozen stanchions and close to three dozen bases were collected. The samples do not include all available lengths of stanchions and angled bases.
They all were examined closely for design, material, finish and workmanship. Extra scrutiny was given to fabricated items—those that are welded or made up of several pieces of stainless plate, tubing and rod.
Cast vs. Welded Bases For those who prefer one-piece construction, the penalty for the solid bronze or stainless castings usually is weight.
For instance, a Vetus base in this test, which is made up of a piece of stainless plate bent to shape and to which is welded a piece of stainless tubing, weighs 8.5 ounces. That light weight was the goal clearly is indicated by a hole punched out to eliminate excess material. When combined with a Vetus tapered stanchion, the pair weigh 1 pound, 11 ounces.
By contrast, a cast stainless steel Spartan base weighs twice as much—18 ounces. Combine that Spartan base with the strongest Tops-In-Quality stanchion (the model reinforced with a fiberglass rod) and the weight soars to just over 3 pounds.
Multiply the weight differences in these combinations by the stanchions needed on most boats and the added weight can get significant…especially to a sailboat that is raced. The choice between fabricated and cast bases should be made by a boat owner; unfortunately, the selection usually is made by the boatbuilder, who too often goes not only for the lightest but also the cheapest.
As with any safety equipment, the primary objective is to have a lifeline system that will save a life. (But because of inherent weaknesses, oneshould never clip a safety harness to lifelines.) That means strength.
In the case of lifelines, it’s likely that when someone falls it will be more likely against the lifelines than against a single stanchion. Some say it’s better to have stanchions bend (to provide some cushion). It seems preferable, in our view, that the stanchions withstand the force.
How much force?
Practical Sailor has struggled with various ways to figure out how much force a grown adult might exert while falling hard. Various drop tests have been considered and rejected as not realistic. However, that does not preclude testing to establish which items in a group are the strongest. Tests that indicate in what manner failure presents itself also can help buyers match their preferences to the products they buy.
Bases sell for about $32-$45.
Design and Quality Before testing was undertaken, the stanchions and bases were closely examined.
For the stanchions, the chart (click here to view) shows evaluations of finish, welding, aesthetics, weight, length and price.
Stanchions made of stainless tubing are manufactured from a flat strip. The ribbon is fed into an automatic machine that forms a tube and welds the seam. Because welds are prone to corrosion, the quality of the weld is important. So is the finish…the polishing of the stainless.
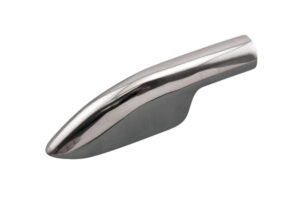
The top details may be a matter of appearance. The castellated tip, shaped like the battlements on the corners of a castle, surely ranks as the second best looking (next to the one-piece aluminum Goiot). As with the pipe tip and ring tip on two of the Tops-In-Quality stanchions, the castellated top is a separate piece that must be welded in place. That increases the possibility of corrosion.
One other consideration of stanchion tips involves comfort and safety. The small tips on tapered stanchions may be sleek and handsome, but the blunt tops on the Schaefer and two of the Tops-In-Quality models, all three on untapered tubing, would be a bit nicer to grab and somewhat safer if one fell on them. Tapered for good looks and with fairly large tips, the Goiot and Matella are good compromises.
Whatever the design, the hole for the lifeline must be smooth to avoid chafing either the plastic cover used on most lifelines or a bare wire lifeline. Because the plastic cover encourages corrosion, bare wire is preferable…except in an anodized aluminum stanchion where the stainless wire would quickly wear away the anodizing.
The mid-hole for the lower lifeline also must be smooth.
It should be noted that, although they may be sold as stanchion bases, some of these bases really are meant for powerboat railings. Included are models from Attwood, Buck Algonquin and Suncor. Others can be found in some discount marine stores. With fewer mounting holes, less material or with a low profile, these “railing bases” seem to satisfy powerboat owners, but should not be used on a sailboat.

Sailboat bases should have a drain hole, because they collect water and debris. The result: Corrosion, which is unsightly but, more importantly, can lead to failure, especially of fabricated bases.
It’s important, too, how the stanchion is secured in the base. It’s not uncommon for someone hoping to avoid a fall to pull up on a lifeline, only to have the stanchion lift out of the base.
The poorest bases have one tiny set screw. Those with two set screws are twice as good as “very poor.”
A requirement, in our opinion, is a bolt, threaded into at least one side of the stanchion and base, but better if run all the way through and secured with an acorn nut, seated in Loc-tite, on the other side. If such bolts hold the stanchion up off the bottom of the base socket, they rarely rattle. Not one of these bases is so equipped, but some easily can be drilled and fitted with a proper through-bolt.
Several years ago we had Tops-In-Quality make up a number of bases for our Tartan test boat and they were quite happy to drill drain and through-bolt holes. We think this is an improvement well worth the modest price increase.
As one manufacturer put it, “Basically, stanchion bases should be inviolate.” They must not break or bend. They also must be powerfully mounted. If not, a failure probably will do some deck damage, which might be dangerous if at sea and expensive to fix anywhere.
Unless it’s light weight you desire, cast bronze and stainless bases are far better than fabricated bases. Fabricated bases always involve the ever-suspect welding and it takes little pressure to distort the fabricated bases, even those with reinforcing struts. When a base bends, it always pulls the mounting holes closer together and squeezes the deck unmercifully. The result: wobbly bases, deck cracks and leaks.
First Phase Testing For the first phase of the testing, fabricated bases were tested with a strong aluminum stanchion…in this case the 1″ OD Matella.
A piece of Sta-Set line was shackled to the hole in the tip of the stanchion and led to a Harken winch mounted on the other end of the long workbench. Interposed in the line was a Dillon dynamometer. It took a pad eye and a block to produce a proper angle for the line to meet the winch. The pull on the stanchion was at about a 20° downward angle…about right for someone falling against the stanchion or lifeline from the opposite side.
The pull, applied by the Harken #32 two-speed, self-tailing winch and registered on a dynamometer, was increased until damage could be seen.
The failure usually presented itself in the form of a bend in the base plate on the backside. When the bend was well-developed and permanent, the pull and angle were recorded.
Second Phase Testing The second phase of the test involved stanchions. All except the big Matella and the metric Goiot are 1″ OD.
The wall thickness of the stainless steel tube stanchions is about .060″. However, because this was a simple strength test, any differences in the wall thickness are moot.
Further, although it is obvious that shorter stanchions would show up better in the testing, no allowance was made for length after it appeared that it wouldn’t make any difference in the final recommendations.
The Spartan plain bronze base ($40) was used for all but the Matella stanchion (which has its own base).
The pull was applied in the same manner as for the bases. With two exceptions, the stainless tubing stanchions all failed in the same manner. One exception was the braced Signet stanchion; it failed where the brace was welded to the main body of the stanchion. The other exception was the 30″ Ronstan; it has holes for three lifelines and bent at both the bottom hole and at the point where the tube entered the base.
Although it might be thought that a stanchion would bend at the mid-hole or, if tapered, near the top, all but the exceptions noted above failed at the compression point where the stanchion emerges from the base. (Tapering is a relatively inexpensive procedure costing a dollar or two.)
It starts with a slight depression and very quickly becomes a deep kink, at which point the integrity of the stanchion disappears.
The aluminum stanchions are different. Firstly, they have more flexibility, meaning that they recover from fairly severe bending. More importantly, they are very strong and retain most of their strength, even when bent severely.
The Bottom Line Because the base should be of unquestioned strength, cast bases (bronze or stainless, but not aluminum) are so superior to fabricated bases that only cast bases are worthy of recommendation. It’s tempting to qualify that statement by saying that fabricated bases might be used if light weight was very desirable; however, making exceptions in safety equipment can lead to regrets.
Of the cast bases in this sampling, those sold by Spartan—especially the bronze model with the excellent drain hole—provided the greatest confidence. The large stainless model from Suncor also appears more than adequate to very heavy usage.
For stanchions, other than the Tops-In-Quality stainless version stiffened with a thick fiberglass rod, none of the hollow stainless tubes are equal to the two solid aluminum stanchions from Goiot and Matella.
The stainless tube stanchions all failed at from 120 to 200 pounds, which, in that emergency setting when someone is thrown hard against the lifelines, is not nearly as good as the reinforced Top-In-Quality, the Goiot or Matella.
The Goiot stanchion is a metric size, which makes it not usable (without some work) with a non-metric base. And the cast aluminum Goiot base fractured at 195 pounds.
That leaves as Practical Sailor’s top choice the new Matella.
Machined of solid 6061 aluminum, assembled with a 7075 aluminum machine screw, the heavily anodized stanchions come with backing plates and 5/8″ nuts. The base even has two O-rings, which makes caulking unnecessary. The Matella stanchions are available in three lengths—26″, 28″ and 30″ and Practical Sailor recommends the longest. They’re even available in colors—bronze, red, green, blue and any other on special order. They fit deck thicknesses from 3/8″ to 1-3/8″.
Two negatives about the Matella: (1) if one is damaged, perhaps by snagging an overhanging dock, the entire unit must be removed for straightening or replacement, which would be more difficult and more expensive than just replacing a bent stanchion; and (2) it is heavy, as mentioned earlier.
On the plus side is the price. A 30″ stanchion, complete, costs $85. By contrast, a chromed bronze Spartan base ($54.65) and the rodded Tops-In-Quality stanchion ($57.90) together cost $112.55 and you must supply your own backing plate and fasteners.
Contacts- Garhauer, 1082 W. Ninth St., Upland, CA 91786, 909/985-9993, www.garhauermarine.com. Goiot, Welmax Marine USA, 220 Lock Rd., Deerfield Beach, FL 33442-1516, e-mail [email protected] . Matella, Box 2849, Big Bear City, CA 92314, 909/584-0168, www.matella.com. Ronstan, 7600 Bryan Dairy Rd., Largo, FL 33777, 727/545-1911, www.ronstan.com. Schaefer, 158 Duchaine, New Bedford, MA 508/995-9511, www.schaefermarine.com. Signet, 505 Van Ness, Torrance, CA 90501, 310/320-4349, www.signetmarine.com. Spartan, Georgetown, ME 04548, 207/371-2542, www.robinhoodyachts.com. Tops-In-Quality, 314 E. Huron Blvd., Marysville, MI 48040, 810/364-7150, fax 810/364-7925, www.topsinquality.com. Vetus, Vetus Den Ouden, Box 8712, Baltimore, MD 21240, 410/712-0740, www.vetus.com. White Water Inc., White Water Marine Hardware, 13663 46th St. North., Clearwater, FL 33762, 800/572-8871, e-mail [email protected] .
RELATED ARTICLES MORE FROM AUTHOR

Safeguarding Sailors via Passage Guardian
Leave a reply cancel reply.
Log in to leave a comment
Latest Videos

Cabo Rico 34 Boat Review

Super Shallow Draft Sailboat: The Leeboard Sharpie

Hans Christian 41T – Boat Review

Seven dead after superyacht sinks off Sicily. Was the crew at...
Latest sailboat review.

- Privacy Policy
- Do Not Sell My Personal Information
- Online Account Activation
- Privacy Manager

Stanchion Layout
January 22, 2020.
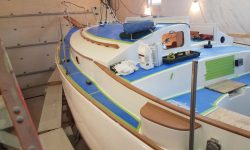
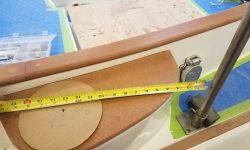
Proposed stanchion layout 1/22/20
The premise of this layout was to include a 24″ gate opening roughly amidships, or just aft of the aftermost chainplate location.
To begin, I adjusted the forward two sets of stanchions so that the length between their tops, and to the connection point on the pulpit, was equal. I kept the second stanchion as close as practicable to the chainplates, while also taking into account the location of a small bulkhead inside the boat (defining the end of the port upper locker).
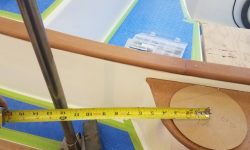
Then, I placed the third stanchion 24″ aft, to create a standard gate opening. From there, I measured aft the same distance I had used forward, and this placed the fourth stanchion just aft of the winch island. In my opinion, this is a good location for the stanchion since it keeps it more out of the way (the sidedeck is quite narrow forward of the winch island), and also leaves the deck forward of the winch clear for the jib sheet track installation. Plus, the spacing interval remains consistent between the bow pulpit and each stanchion thereafter (other than the gate).
The spacing between the 4th stanchion and the stern pulpit is a bit shorter, but with the gate located where it is, and other considerations and conflicts, there is no way to make all the lengths exactly the same. But this is the best place to have the inconsistent length in any event, visually and otherwise.
Note that I could, if necessary, adjust the gate position aft, but not forward without interfering with the stays.
These photos show the layout from as many angles as possible.
The placement of the 4th stanchion aft of the winch island also keeps the winch area clear for handle operation, with over 13″ between the winch location and the stanchion. There is still access to the shore power plug.
Were I to move the stanchion base forward of the winch island, I’d have to place it no further aft than shown here in order to allow winch handle operation (12″ or more). This location also interferes with one of the toerail scupper locations, and would limit the options for placement of the jib sheet track. All in all, for many reasons, the 4th stanchion works much better just aft of the winch island.
Search The Site
- Forums New posts Unanswered threads Register Top Posts Email
- What's new New posts New Posts (legacy) Latest activity New media
- Media New media New comments
- Boat Info Downloads Weekly Quiz Topic FAQ 10000boatnames.com
- Classifieds Sell Your Boat Used Gear for Sale
- Parts General Marine Parts Hunter Beneteau Catalina MacGregor Oday
- Help Terms of Use Monday Mail Subscribe Monday Mail Unsubscribe
replacing lifelines - stanchion issue
- Thread starter Sherry
- Start date Jun 23, 2012
- Forums for All Owners
- Ask All Sailors
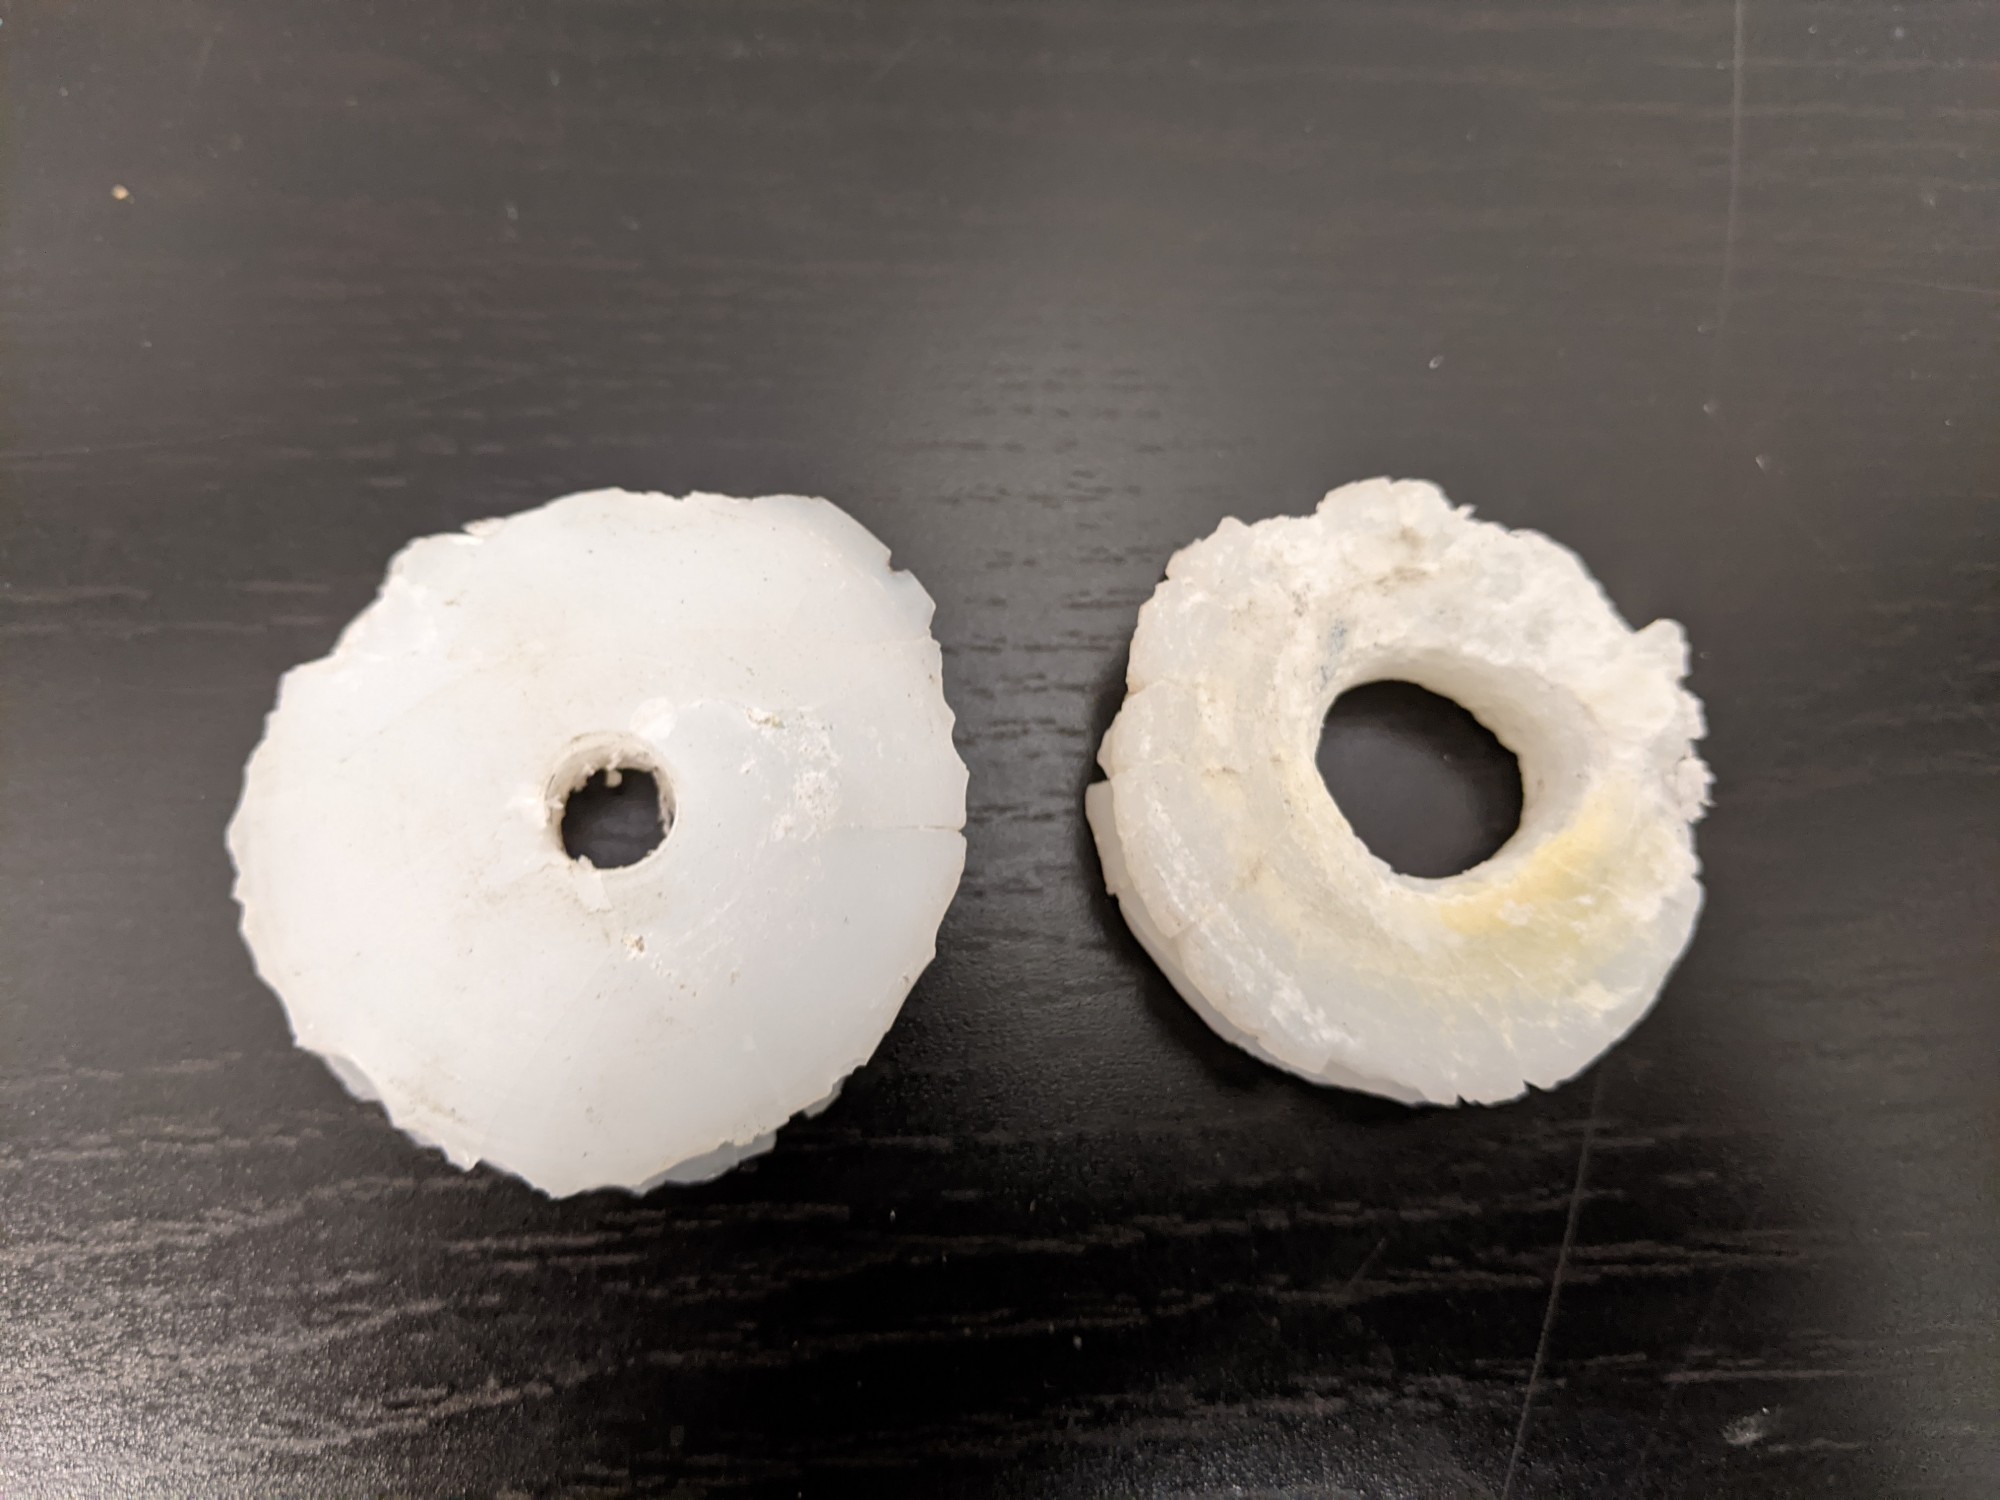
Well as usual with my boat projects, one good thing leads to another.... I want to replace my lifelines. I took the port top lifeline off with no issue - easy. Then I started on the lower lifeline. Uh oh. I have three stanchions; the middle one is fine. The fore and aft ones are not. The holes that the lifelines pass through are distorted - like something has pushed up inside the hole? The lifeline is trapped; I can't work it free. Looking at it further, I wonder if I'm going to have to replace those stanchions as well. If so, can I replace just the straight vertical piece of the stanchion, or do I have to replace the bases as well? I haven't been looking yet to see how (in)accessible the underside of the bases will be. Suggestins/ideas? Photos attached. Thanks in advance.
Attachments

Phil Herring
Re: replacing lifelines - stanchion issue - 1992 H30 You want to do everything you can to save those stanchions. There are no tapered stanchions for sale anywhere that we know of and to our knowledge, there is only one source. We're working with them to produce a large batch but they're not very interested in the project so it's slow going. Someone who works with stainless can offer better advice than me, but you might carefully drill out the hole and put a ferrule inside to contain the line. That said, I wouldn't do anything until you get advice from a pro.

stevec22206
Friend of mine has a 33.5 and experienced the same issue. Believe there to be nylon grommet inside the stanchion and it may have been force upwards due to temperature changes and potential moisture inside the stanchion. Upwards pressure pinches the lifeline. We were able to eventually work them out but I recall he removed all the stanchions, took them home and may have used a dremel to bore them out to relieve the tension enough to get the lifeline thru. Steve

just replace them all they look pretty torn up and seem like a good way to cut yourself, and what would be the point of having nice new lifeline on crappy stanchion, just get the top part, they are probably 7/8 or one inch.

If the tube and base are separate pieces on your boat, you can simply replace the tube. They are held in place with set screws. Your pictures are inconclusive as to this issue.... but a simple inspection, looking for set screws and evidence of a joint between tube and base, should allow you to determine this on your own.
Back to the boat this afternoon. I can't just replace the poles; they are welded to the base. I cannot determine how to access the bottom of the fasteners holding the base on. What happens if I unscrew these without being able to access the bottom? Thanks in advance.

Sherry said: Back to the boat this afternoon. I can't just replace the poles; they are welded to the base. I cannot determine how to access the bottom of the fasteners holding the base on. What happens if I unscrew these without being able to access the bottom? Thanks in advance. Click to expand
The stanchions are bolted from the under side of the toe rail. The screws are machine screws attached to an aluminum plate imbedded in the deck. You can remove the the stanchion and drill out the hole for the life line and put a plastic farrell in to protect the lifeline.
They look to be 'coated' lines, might try to cut/peel the cover off close to the stanchion and clamp on a pair of 'vice grips' and twist the cable free. It is IMPORTANT to twist the same way the cable is twisted, as this should make the cable smaller, by tightening the twist of the cable. My.02
Joe, AirborneSF and Orion - thank you all for your responses. Orion - if I understand you correctly, there is no nut on the bottom of a bolt; these are screws instead. So I can unscrew them, detach the stanchion, do whatever I need to do, and then re-attach the stanchion - all without ever having to find access to the bottom of the screw inside the hull? Thanks again!
That is correct. There is a bolt that threads into the stanchion from under the toe rail. When you put it back together put a small piece of plastic (ie. a piece of milk bottle)between the toe rail and the stanchion to lessen any dissimilar metal reaction.
Chris Nowell
First thing I'd do is consult a metal fabrication shop that specializes in stainless steel. I personally wouldn't trust any piece of equipment that had been compromised in any way. A lot of these fabrication guys have brilliant ideas when it comes to restoration and repair and they're worth spending some time talking to. As far as the under side of the bases go, you just have to get in there and look. If you're really lucky you will only have to remove a bit of carpet or wall covering to access the nuts. If you're not so lucky you will have to remove walls, cabinetry, carpet, and wall coverings to gain access, as we had to in our last project. Luckily we did too because although the fiberglass and gelcoat appeared to be in good shape on the outside, once we exposed the under side we discovered signs of stress and had the opportunity to reinforce the stantion bases with blocks of teak epoxied onto the underside of the attachment points. I've been told that I'm far too anal when it comes to things like this but I think it's always better to be safe than sorry when you rely on such equipment to avoid being hurt or killed. Good luck.

What is to stop you from simply opening up the lifelines hole with a drill?
higgs said: What is to stop you from simply opening up the lifelines hole with a drill? Click to expand
I learned from Hunter (thank you Phil!!!) how the stanchions are attached. Working on options for repairing/replacing now. Orion - your description was right on target. Thanks all for the help! Moving in the right direction - just not sure if I should repair or replace. Not sure if we go the repair route what I will use for ferrules inside the stanchion. Hunter tech support says: "The tapered stanchions have to 2 (1/4-20 x 1 1/4" flat head machine bolts that are drilled and taped into a aluminum plate in the deck. There also is one 5/16 X 1 3/4" Hex Head Machine Bolt, with 5/16" flat washer and 5/16" lock washer. The 5/16 Hex Head Bolt goes through the bottom of the Hull Flange, up through the Deck Flange and Aluminum Toe-Rail and threads into the bottom of the tapered stanchion. Also note that if a customer replaces a stanchion or the 5/16" Hex Head Bolt that they should put a little anti-seize in the base of the stanchion so there's no chance of the bolt locking up." In other words, there should be a hex head for the bolt on the bottom side of the hull to deck joint, or possibly the toe rail.
- This site uses cookies to help personalise content, tailor your experience and to keep you logged in if you register. By continuing to use this site, you are consenting to our use of cookies. Accept Learn more…
Visit our Popular Forums
- Monohull Sailboats
- Multihull Sailboats
- Powered Boats
- General Sailing
- Antares Yachts
- Fountaine Pajot
- Lagoon Catamarans
Cruising Business
- Boat Classifieds
- General Classifieds
- Crew Positions
- Commercial Posts
- Vendor Spotlight
Life Aboard a Boat
- Provisioning: Food & Drink
- Families, Kids, & Pets Afloat
- Recreation, Entertainment, & Fun
- Boat Ownership & Making a Living
- Liveaboard's Forum
Seamanship, Navigation & Boat Handling
- Seamanship & Boat Handling
- Training, Licensing, & Certification
- Health, Safety, & Related Gear
- Rules of the Road, Regulations, & Red Tape
Engineering & Systems
- Const. / Maint. / Refit
- Product / Service Reviews
- Electronics: Comms / AV
- Electrical: Batts / Gen / Solar
- Lithium Power Systems
- Engines & Propulsion
- Propellers & Drive Systems
- Plumbing / Fixtures
- Deck Hdw: Rigging / Sails
- Aux. Equipment & Dinghy
- Anchoring & Mooring
Photo Categories
- Member Galleries
- Life Onboard
- Sailing in the Wind
- Power Boats
- Cruising Destinations
- Maint. & Boat Building
- Marine Life
- Scuba Diving & Divers
- General Photos
Recent Photos

Listing Categories
- African Cats
- view more »
- Crew Wanted
- Crew Available
- Enhance Your Account
- Meet the Mods
- Meet the Advisors
- Signup for The Daily Cruiser Email

| |||||||||||||||||||||||||||||||||||||||||||||||||||||||||||||||||||||||||||||||||||||||||||||||||||||||||||||||||||||||||||||||||||||||||||||||||||||||||||||||||||||||||||||||||||||||||||||||||||||||||||||||||||||||||||||||||||||||||||||||||||||||||||||||||||||||||||||||||||||||||||||||||||||||||||||||||||||||||||||||||||||||||||||||||||||||||||||||||||||||||||||||||||||||||||||||||||||||||||||||||||||||||||||||


IMAGES
VIDEO
COMMENTS
Images: 1. Lifeline Stanchion Spacing. I have a 33' sailboat with fixed bow and stern pulpits but only 3 stanchions in between. The lifelines go outside the shrouds amidships and rest against the uppers with the nearest stanchions are about 7' fore and aft. This arrangement does allow me to keep them nice and tight, but they also tend to climb ...
Guardrails and stanchions can save your life, so it's essential to make sure they are in good condition. Ian Nicholson's industry reference, The Boat Data Book, gives good advice: for a yacht up to 12m LOA, use wires of at least 4mm diameter in 316 grade stainless steel, 1×19 construction and a maximum stanchion spacing of 2.2m. Industry ...
It would have four through bolted mounting bolts with a 1/8" backing plate. All bolts will have appropriate size washer on the inside. the stanchions will be 36" long by 31/32" held in place with through bolt and lock nut. The stachions will have two safet SS wire.
Step 2. Remove interior trim or headliner to expose the nuts holding the stanchion base in place. Remove the nuts with a wrench. You may need a helper on deck with a large screwdriver to stop the bolt from turning. Withdraw the bolts and inspect for pitting or crevice corrosion.
Stanchion height and placement, line spacing (both horizontally and vertically), tension, deflection, toerails, etc. all need to be carefully considered. For professional installation or to discuss your own lifelines, email us at [email protected] or call us at 619-223-3788. We always look forward to hearing from you!
Stanchions should normally be a minimum of 610mm high and are often as high as 900mm, with a maximum spacing of approximately 2 metres. Normally, two wires are fitted: an upper guard wire at full height (minimum 600mm) and a lower guard wire at an intermediate level.
Every Fall I remove the stanchions and lifelines from my sailboat, so I have to put them back on in the Spring. This video shows the procedure and also incl...
The base even has two O-rings, which makes caulking unnecessary. The Matella stanchions are available in three lengths—26″, 28″ and 30″ and Practical Sailor recommends the longest. They're even available in colors—bronze, red, green, blue and any other on special order. They fit deck thicknesses from 3/8″ to 1-3/8″.
The spacing of these stays forward of 0,07L from the forward perpendicular is to be not more than 1,2 m on Type `A', Type `B-60' and Type `B-100' ships (as defined in Pt 3, Ch 11, 1.1 ... supported by stanchions not more than 10 m apart, or a single hand rail or wire rope attached to hatch coamings, continued and adequately supported between ...
Plus, the spacing interval remains consistent between the bow pulpit and each stanchion thereafter (other than the gate). The spacing between the 4th stanchion and the stern pulpit is a bit shorter, but with the gate located where it is, and other considerations and conflicts, there is no way to make all the lengths exactly the same.
Usually race boats are designed to minimize the number of stanchions and take advantage of the maximum spacing. Rarely are stanchions placed at maxim beam. Many race boats do not have toe-rails and for a 29 foot boat the gap between stanchions is about ¼ the length of the boat. I've seen people insist on tying fenders to stanchion bases and ...
Stanchions are usually (and properly) separate and removable from their Stanchion Bases. It is common for Stanchions to bend (when meeting pilings or other boats); we believe it is not reasonable to require a boat owner to go through the extra time, difficulty and expense of unbolting the Stanchion Bases from the deck when only a Stanchion ...
Jun 25, 2012. #9. The stanchions are bolted from the under side of the toe rail. The screws are machine screws attached to an aluminum plate imbedded in the deck. You can remove the the stanchion and drill out the hole for the life line and put a plastic farrell in to protect the lifeline. A.
Re: Mounting Stanchions. Make some pads about 1/2" high. G10, fiberglass, whatever. Bevel the edges for your feet. Epoxy them to the deck. Drill, clean, scuff up the bottom of the stainless with 36 on a mini grinder, acetone, stick on with 5200 not hard then retighted in a few days. Never liked tape.
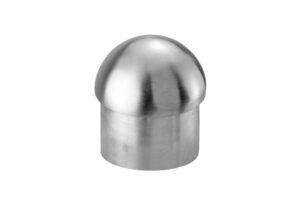
Retail and bulk packaging available. The Lifeline Stanchion is available in a variety of heights, as well as custom heights. This stanchion is made from grade 316 stainless steel for maximum corrosion resistance and durability. It is ideal for sailboat and powerboat railings. The S3608-0025 Bullet Cap is included in the Stanchion Assembly.
Description. Schaefer's stanchion system offers models for single or double lifelines, with a choice of 24" or 26" height. Heavy-duty 1'' diameter, 1/16" thick stainless stanchion tubes have integral top caps and accept coated lifeline wire up to 5/16'' (8mm) diameter. Other Components. Works with rugged 36-01 stainless base (sold separately ...
Butyl could be good as it works by compression. Another option is Dolfinite. It's a semi-paste (I think that's how it's described). You can put it down at the base, tighten the bolts just enough to hold it in place. Then, once it dries, you can tighten more and the compression will help seal it from water.
7-0.8m apart. Makes sense: people do not have arms of endless lengths. 2m above deck or bulwark. Makes sense as well, you need a stanchion of this length to prevent falling down. Minimum diameter 32mm. Also makes sense: when they are too thin, you can't get a firm grip and your hands might slip.
Stanchion Bases listed here are for use with 1" (25.4mm) or 25mm Metric Stanchions unless otherwise noted. A Plastic Stanchion Base (Special for C&C Yachts) is listed with other C&C Stanchion Bases, under Aluminum Stanchion Bases. For Backing Plates, See: Stanchion Base Backing Plates. See also, Stanchions. Stainless Steel (1") Stanchion Bases.
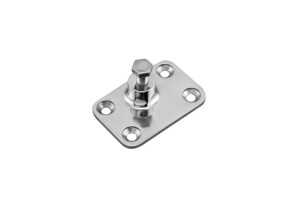
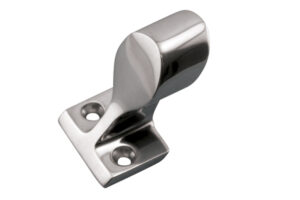
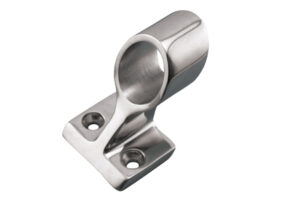
Trapezoidal SS Stanchion Base with Double Bails and a 5° inboard angle. Formed, Welded SS Base is (maximum) 5" long x 2 3/4" wide x 1/8" thick, and attaches to Deck with (4) 1/4" screws on 4" (inboard) x 2 3/4" (outboard) hole centers in 'S' Base pattern, below.Base has formed drainage channel to prevent water build-up in socket.
A stanchion is an important piece of equipment used on boats for a variety of purposes. It is a vertical post or bar that is used to provide support and stability to the boat. Stanchions are typically made from metal, wood, or plastic and can be found in a variety of sizes and shapes. Stanchions are most commonly used on sailboats to provide ...
The removable bayonet-mount stanchion has a special deck socket to be mounted on the boat and a bayonet coupling device that engages with a 90° rotation. The stanchions are available in 2 sizes, with tube diameters of 45 mm or 66 mm. ...
Description. Tapered 1"dia. stanchions in Type 316 stainless steel with two lifeline wire holes at 12" spacing, except for 18" model with only one hole.